
How to link Go Getter with Zensoft
In the article below, we will focus on how to link Go Getter with Zensoft.
What do you need to successfully use this integration:
- The name of the accounting package used by your accountant
- The frequency at which the invoices should be sent
- The e-mail address the invoices should be sent to
Establish the connection:
- Log in to the admin panel and go to the "Integrations" tab.
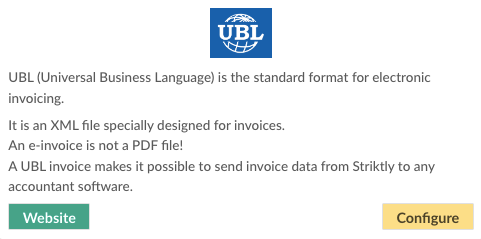
- Navigate to UBL and select "Configure".
- On the next page, enter a start date (all invoices from this date onwards will be exported).
- In the second field, you select the UBL version supported by your accountant's software.
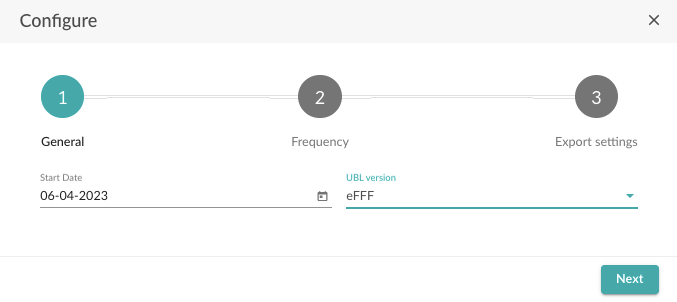
The UBL version is contingent upon the version supported by the accounting program that reads the UBLs. When in doubt, consult with either the accounting software manufacturer or your accountant.
- Select "Next".
On the next page, you can choose between manual or automatic export, we opt for automatic export.
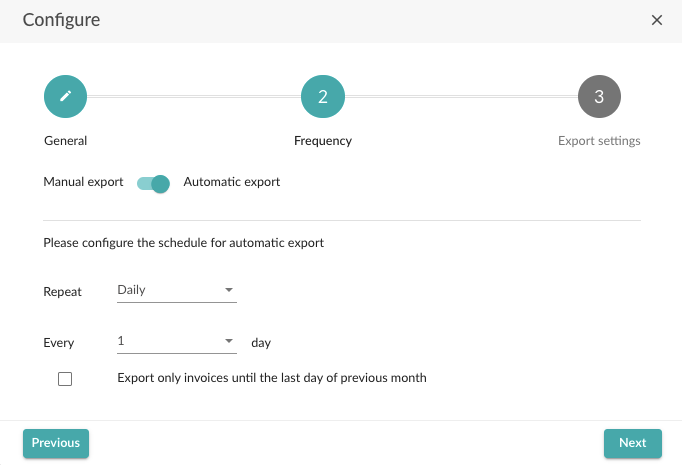
- Adjust the frequency of exports. This can be daily, weekly or monthly.
- If you choose weekly or monthly, you can also specify the day on which the export should take place.
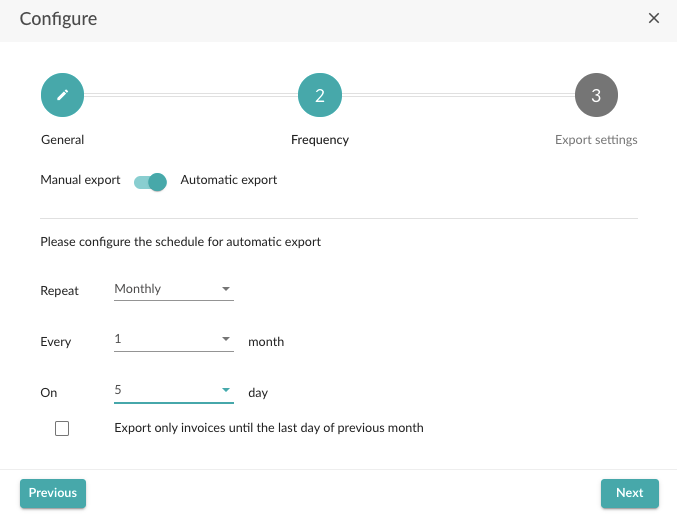
Most customers prefer scheduling a monthly export a few days into the new month, allowing for a comprehensive review by both you and your accountant.
It is important to note that filing VAT returns on a monthly basis is required, with a deadline on the 16th. To ensure adequate preparation time for your accountant, we recommend exporting data on the 5th day of the following month. Don't forget to select only the previous month's invoices before sending.
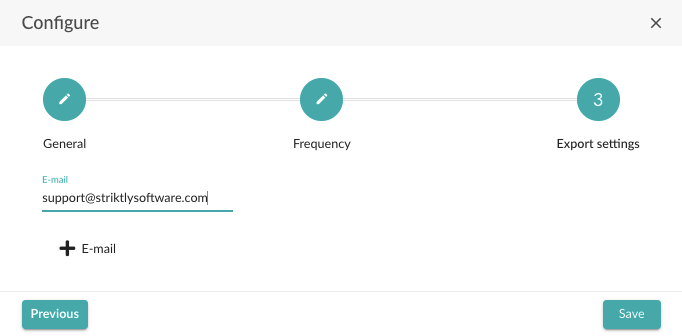
- After adjusting the settings, select "Next".
- Finally, fill in the e-mail address the invoices should be sent to.
- Select "Save".
If you have followed the steps correctly, your outbound invoices will now be automatically delivered to your accountant.
- After completion of the preceding steps, you will receive the following e-mail in your mailbox.
- Click on "Download" to download the UBL files in zip format.
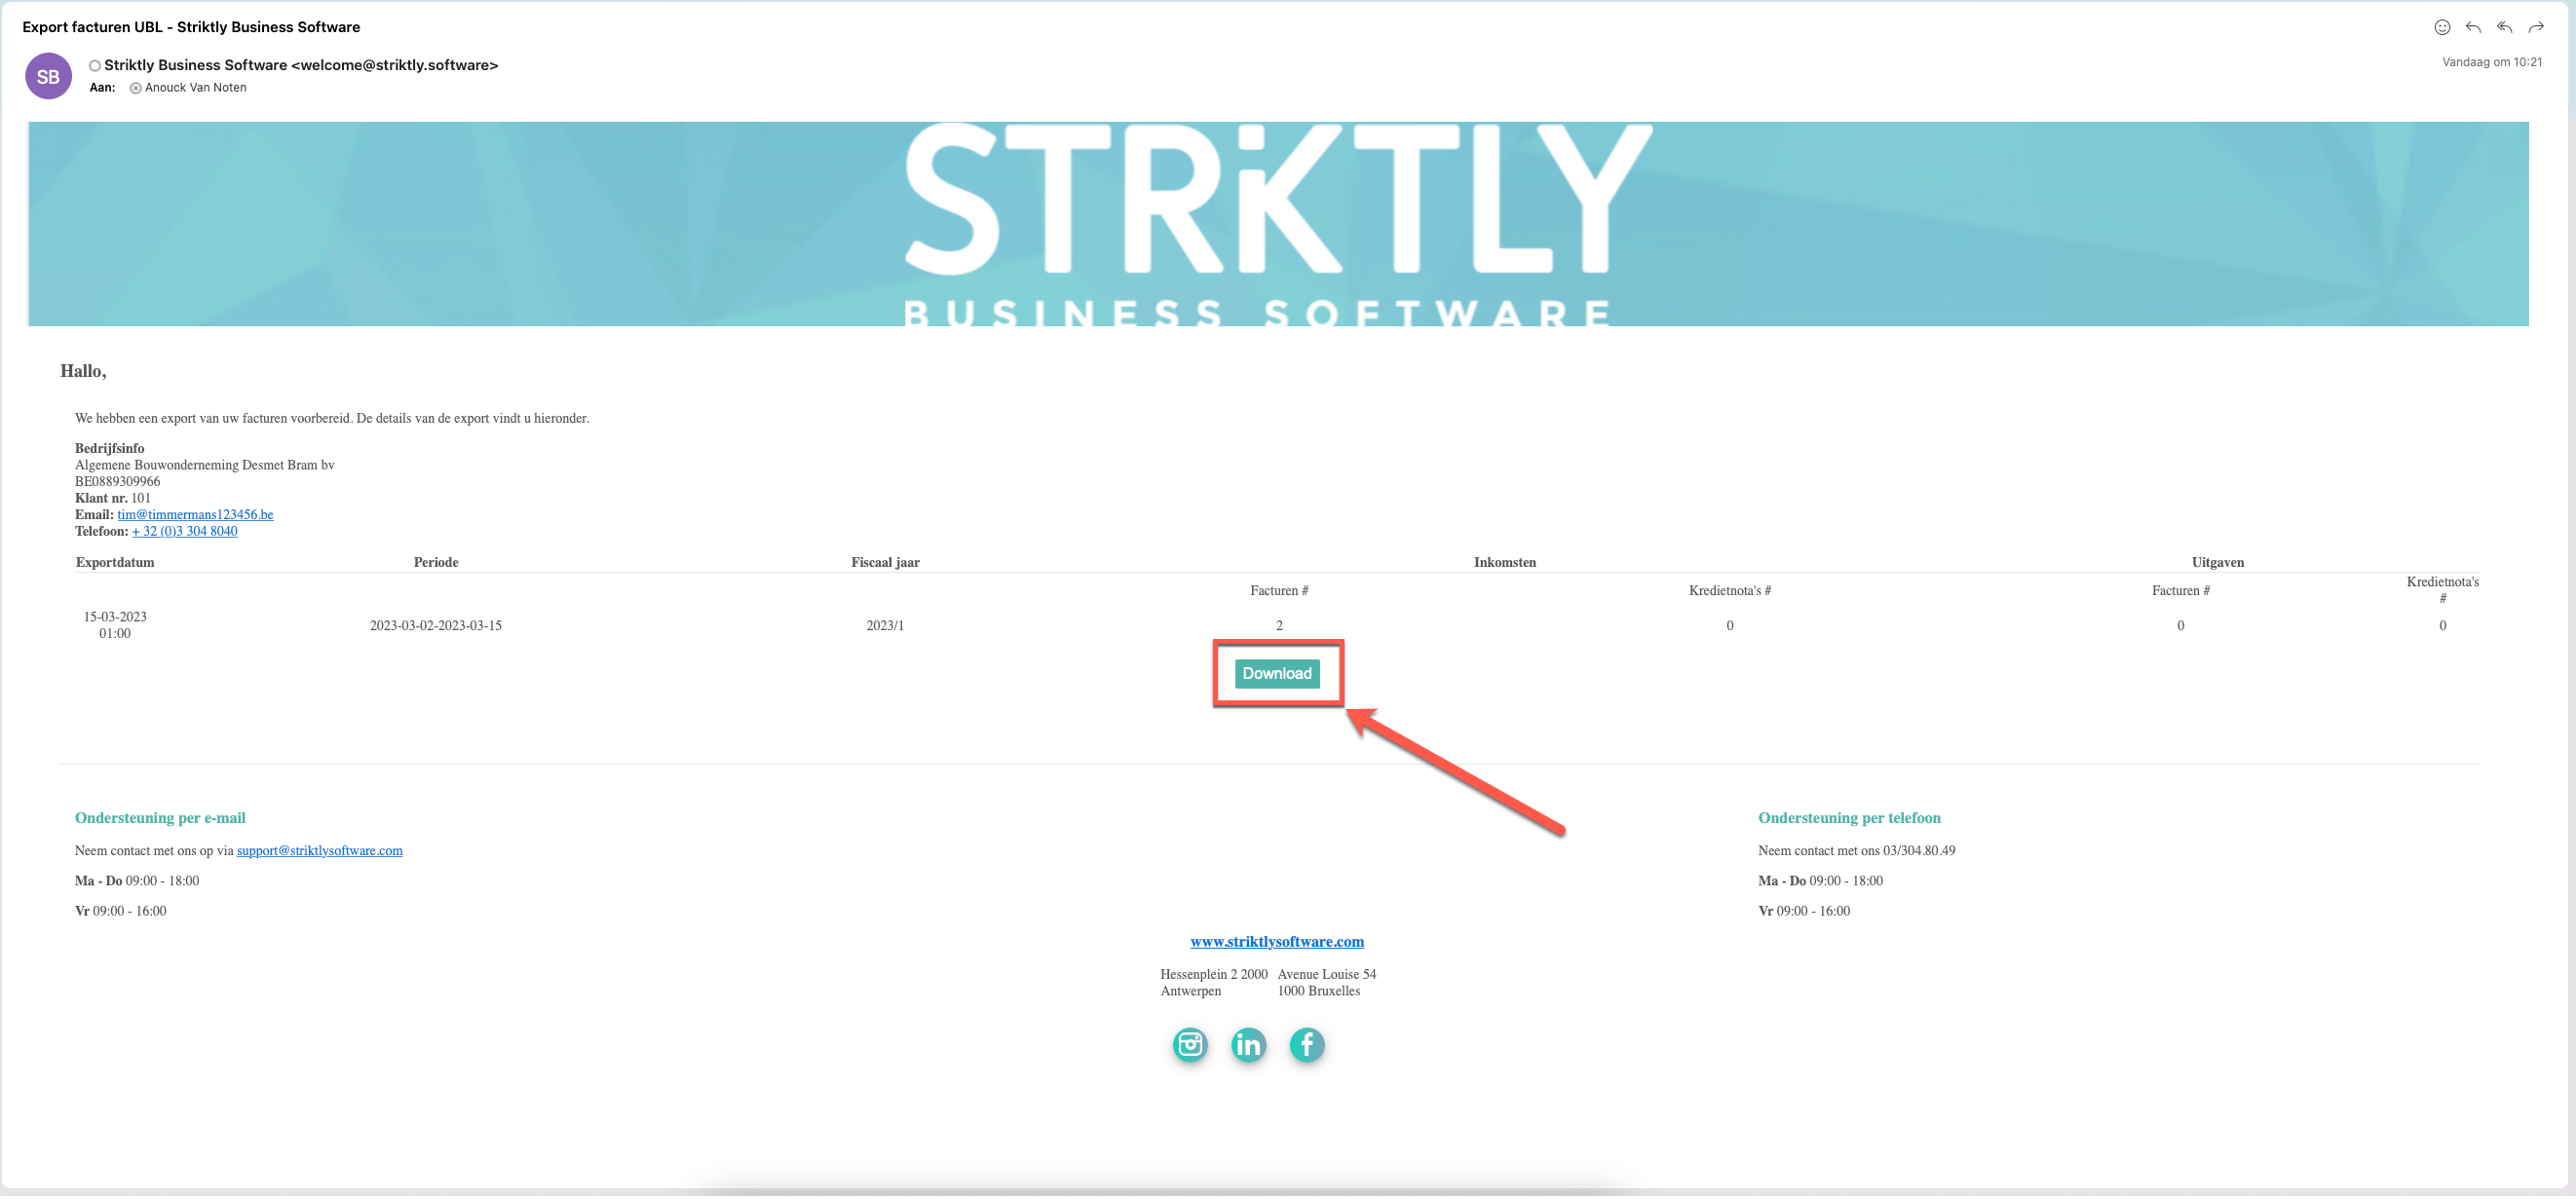
- Open the file in order to extract the documents.
Efficiently streamline the UBL storage process for Zensoft by correctly placing the files from the ZIP archive on your computer.
Import UBL files into Zensoft:
Importing sales invoices - settings:
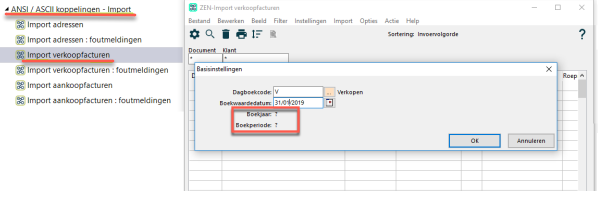
- Navigate to "Packages" - "Accounting" - "ANSI / ASCII integrations" - "Import".
- Select "Import sales invoices".
- You will be asked in which journal and accounting period the invoices are to be recorded.
- Next, navigate to "Import" - "Set default".
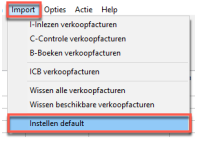
- Select the following settings:
- Version: OCR via E-fff
- Autocomplete doc (record): yes
- Method: directory by name
- Directory: should be completed correctly (suggestion from the company).
- All the other details are already completed correctly.
Import sales invoices:
- Navigate to "Import" and select "Upload sales invoices".
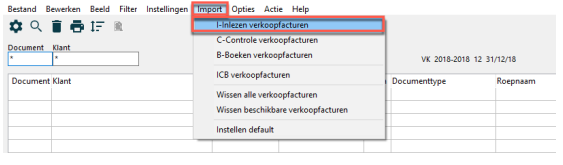
- Invoices are now uploaded in the period you selected in the preceding step.
- In case documents have been uploaded with a document date that does not belong to the selected period, you will receive a notification after completion of the process. This notification only serves as a warning.
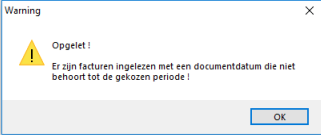
- To avoid recording these documents, simply navigate to the selection screen in order to locate the relevant files, and apply a date restriction. Once done, you can proceed to manually delete the documents as needed.
- Next, go to "Import" and select "Check sales invoices".
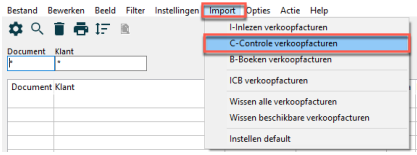
- Upon completion of the verification process, distinct invoices that are prepared are assigned a specific status while a report containing diverse error messages is generated.
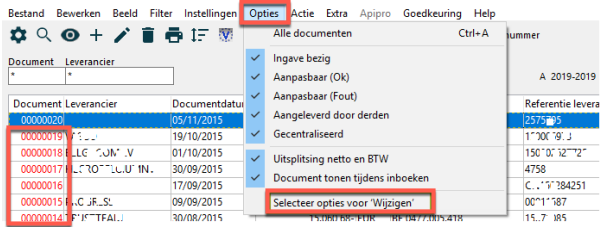
- Scan the invoice for errors. If the invoice contains incorrect lines, you can either delete them one by one or delete them all together. In order to do this, navigate to the "Options" tab and do not tick "Checked (ok)". Afterwards, go to "Import" and select "Delete available sales invoices".
- Check the invoice again and confirm the record via "Import" - "Record sales invoices".

Recording sales invoices:
- On the following page, all the uploaded entries will be colored red, unless you are working with a check based on minimum amount.
- In order to easily scan through all the entries highlighted in red, navigate to "Options" and select "Select options to Change".
- Select "Incorrect documents only". The selection of "up" or "down" is contingent upon the current line chosen in your web browser.

- To confirm the entry, click "OK" or press the F12 key.
- The subsequent record to be reviewed will open automatically, along with the corresponding pdf file, provided that the appropriate parameter has been set in the journal.
Importing purchase invoices:
- The process of importing purchase invoices is similar to that of importing sales invoices.
- Navigate to "Packages" - "Accounting" - "ANSI / ASCII integrations" - "Import".
- Below you will find "Import purchase invoices".
Similar to the import of sales invoices, purchase invoices will be uploaded into the activated company.
Note that there are no available screenshots in English of the above software package.