
How to link Go Getter with Venice
In the article below, we will focus on how to link Go Getter with Venice.
Currently, Venice only supports UBL import.
What do you need to successfully use this integration:
- The name of the accounting package used by your accountant
- The frequency at which the invoices should be sent
- The e-mail address the invoices should be sent to
Establish the connection:
- Log in to the admin panel and go to the "Integrations" tab.
- Navigate to UBL and select "Configure".
- On the next page, enter a start date (all invoices from this date onwards will be exported).
- In the second field, you select the UBL version supported by your accountant's software.
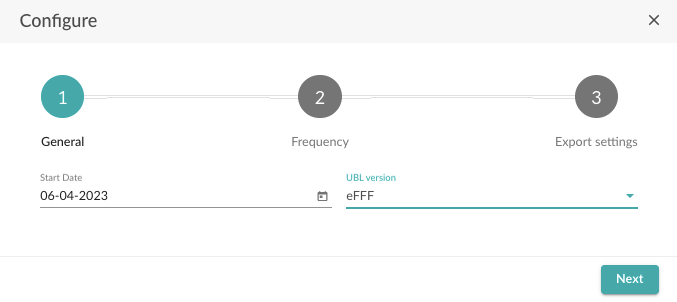
The UBL version is contingent upon the version supported by the accounting program that reads the UBLs. When in doubt, consult with either the accounting software manufacturer or your accountant.
- Select "Next".
On the next page, you can choose between manual or automatic export, we opt for automatic export.
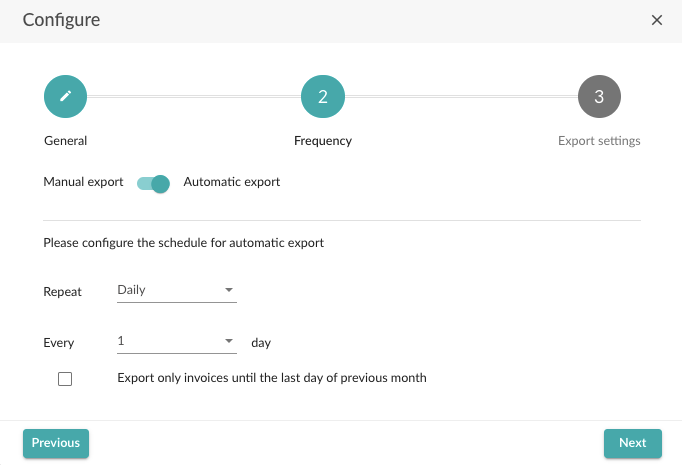
- Adjust the frequency of exports. This can be daily, weekly or monthly.
- If you choose weekly or monthly, you can also specify the day on which the export should take place.
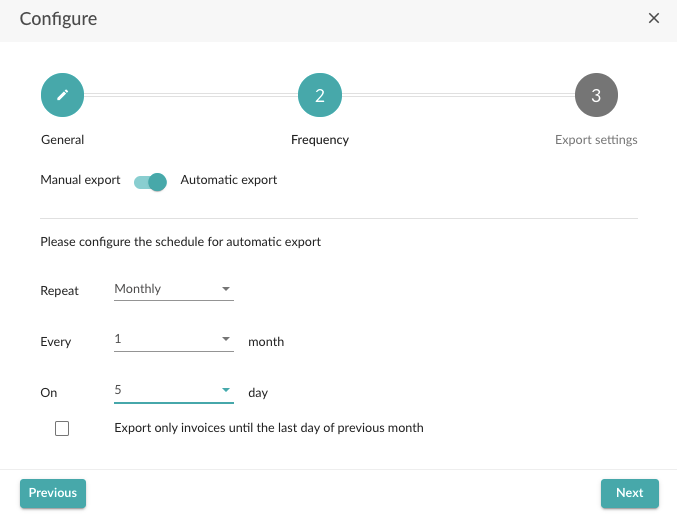
Most customers prefer scheduling a monthly export a few days into the new month, allowing for a comprehensive review by both you and your accountant.
It is important to note that filing VAT returns on a monthly basis is required, with a deadline on the 16th. To ensure adequate preparation time for your accountant, we recommend exporting data on the 5th day of the following month. Don't forget to select only the previous month's invoices before sending.
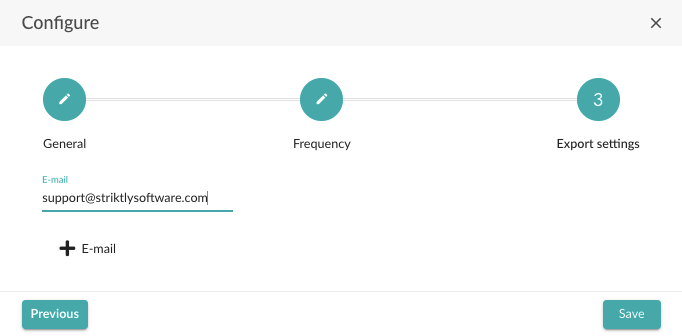
- After adjusting the settings, select "Next".
- Finally, fill in the e-mail address the invoices should be sent to.
- Select "Save".
If you have followed the steps correctly, your outbound invoices will now be automatically delivered to your accountant.
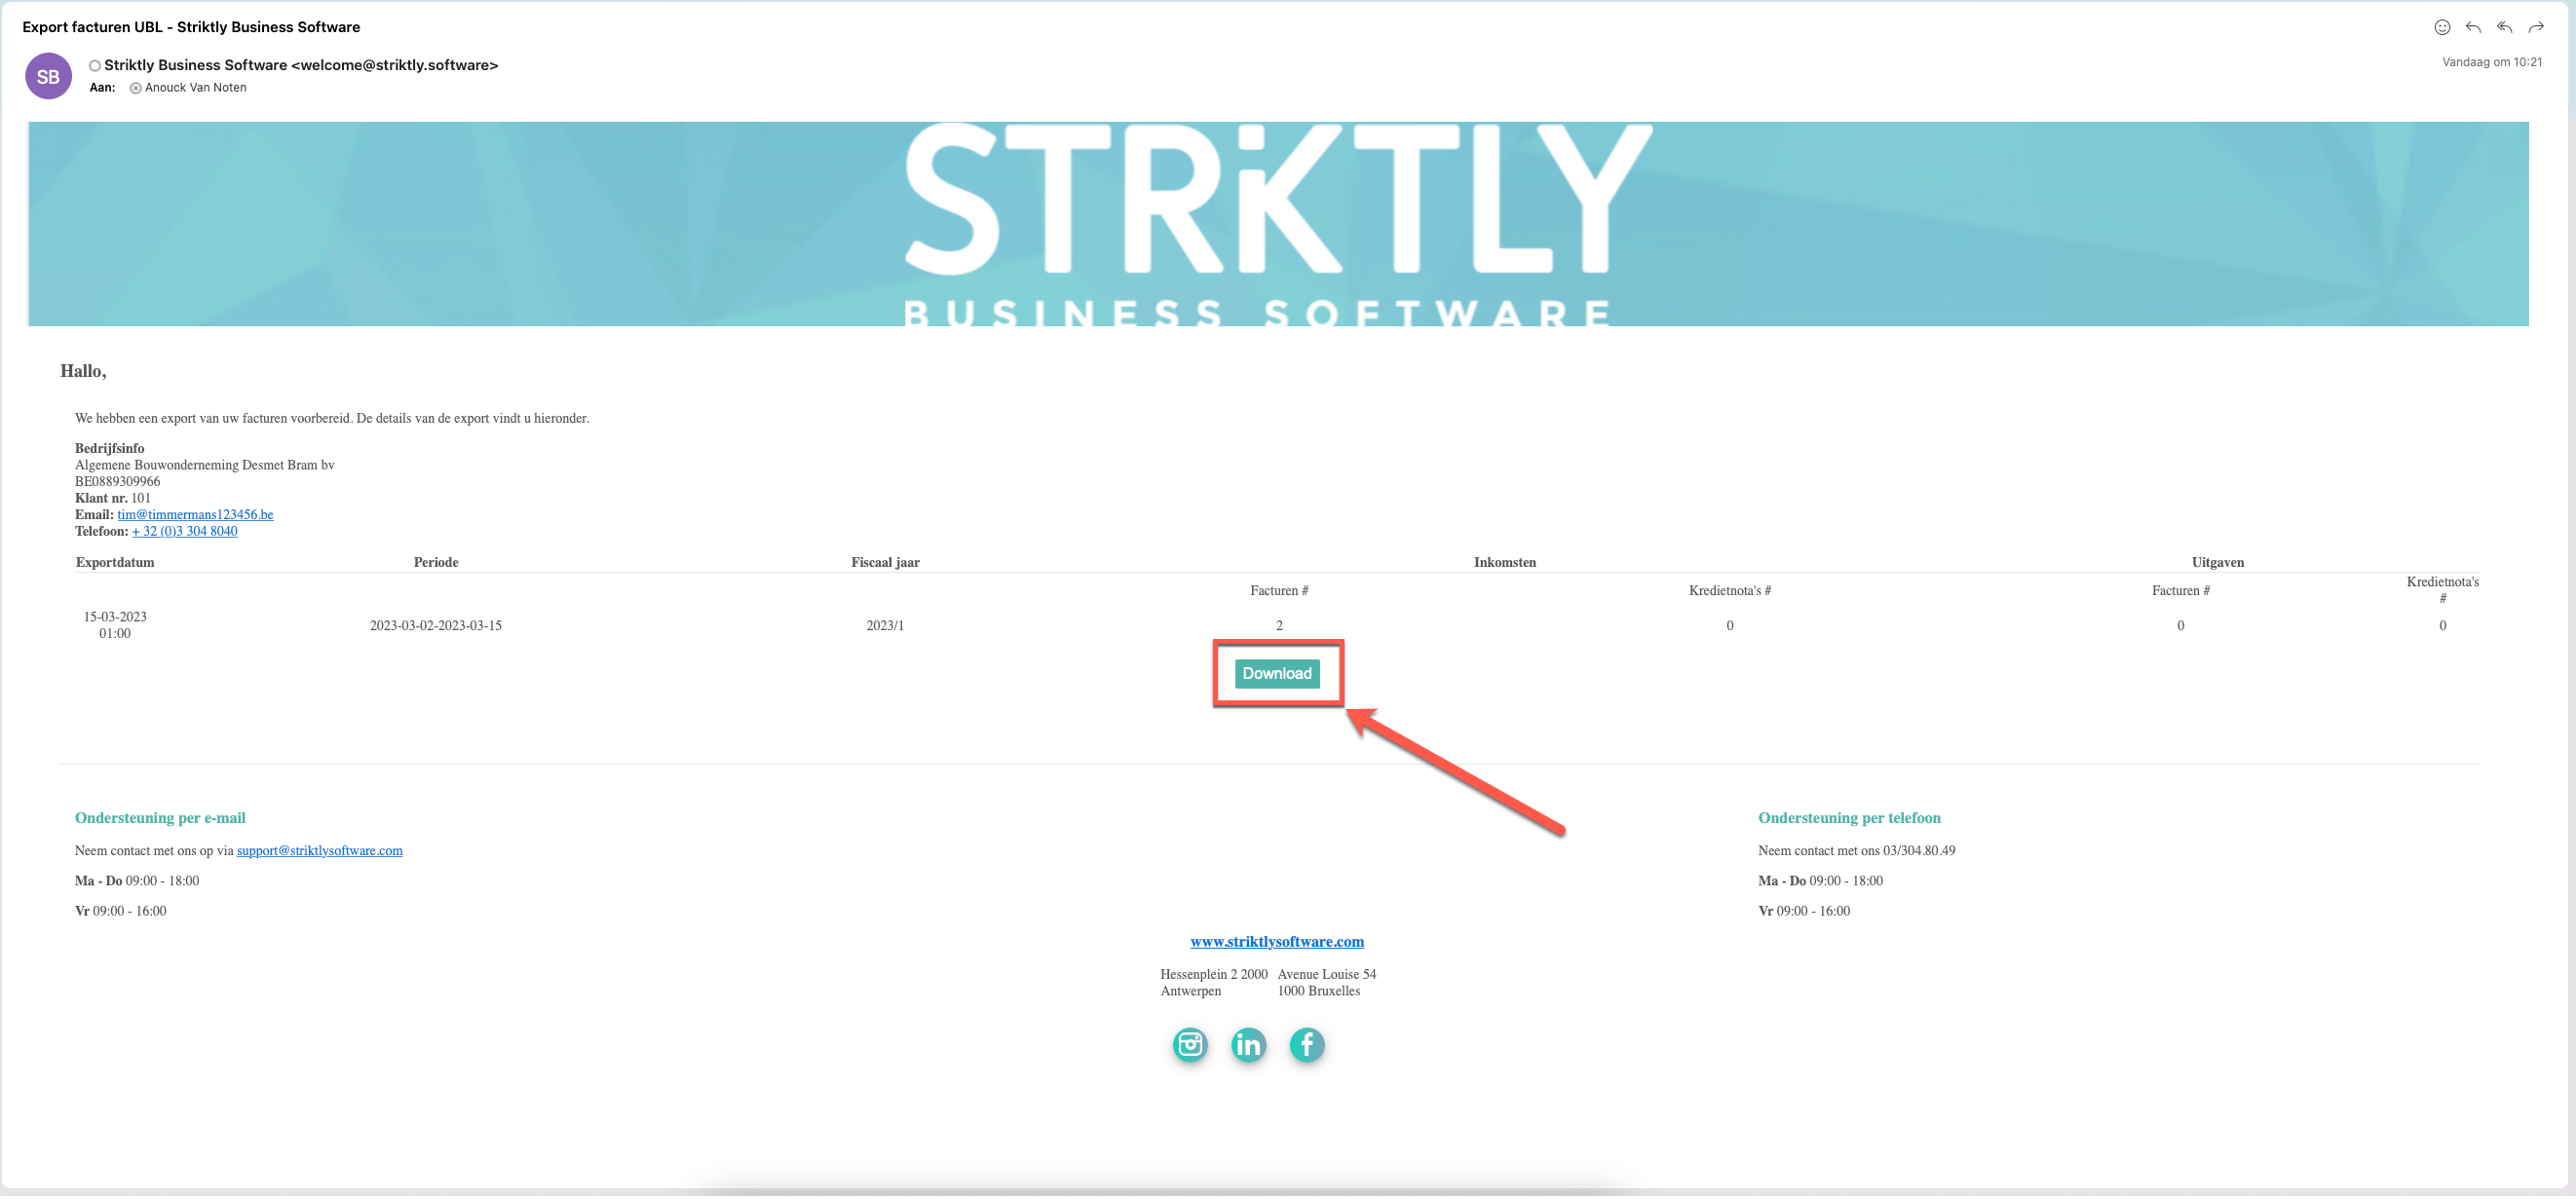
- After completion of the preceding steps, you will receive the following e-mail in your mailbox.
- Click on "Download" to download the UBL files in zip format.
- Open the file in order to extract the documents.
Efficiently streamline the UBL storage process for Venice by correctly placing the files from the ZIP archive on your computer.
Import UBL files into Venice:
Valid UBL file:
- Prior to importing sales invoices, it is crucial to verify that the UBL file meets all necessary parameters, such as incorporating sales accounts and customer numbers.
- The UBL file should also have a unique ID. Namely, the tag <cbc:ID></cbc:ID> as well as the field "Sales.Goods Document Identification" in the section "Sales".
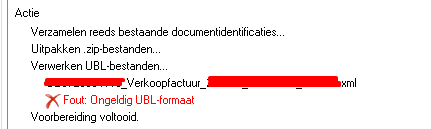
- If the file does not meet any of the above characteristics, you will receive an error message. Venice will then not be able to correctly transfer all the info into the system.
Import sales invoices in Venice:
UBL files typically do not include customer numbers. When you read UBL files, existing customers are recognized based on their VAT number, so you shouldn't face any issues. However, new customers will be automatically assigned a number in Venice, which may not always match the number they have in your external package. If you want customer numbers to match in both packages, it is crucial to ensure that your Venice customer data is up-to-date before importing UBL files, either through manual entry or a separate import process.
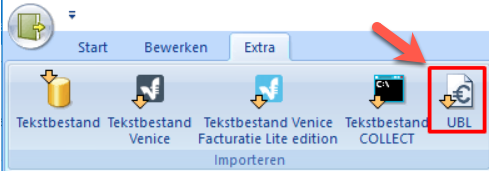
- Go to "Start" - "Accounting" - "Sales" - "Tab extra" - "Import UBL".
- You will now be shown the following page.
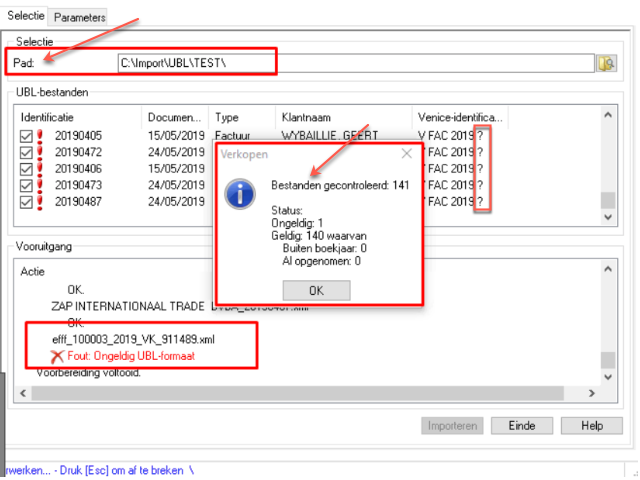
- Enter the location where you saved the UBL files.
- Venice will thoroughly scan all files in the selected location and provide a comprehensive report on the total number of files, along with the number of valid files. The program will also indicate if there are any sales that fall outside the current financial year or have already been imported. Any invalid files will be identified and reported.
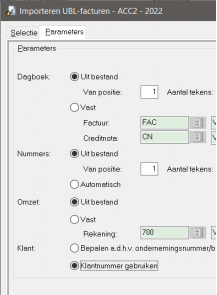
- Next, you need to specify how the numbering should be determined in Venice.
- If Venice fails to determine a sales number for importation, the document number field will display a question mark.
- If this problem occurs, navigate to "Parameters" and define how the document numbers should be determined in Venice.
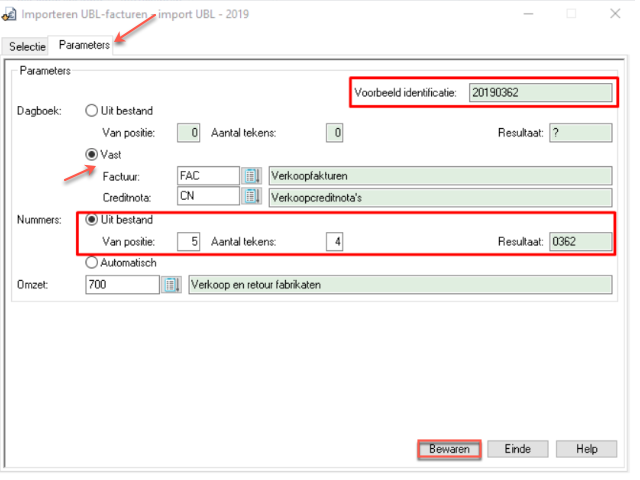
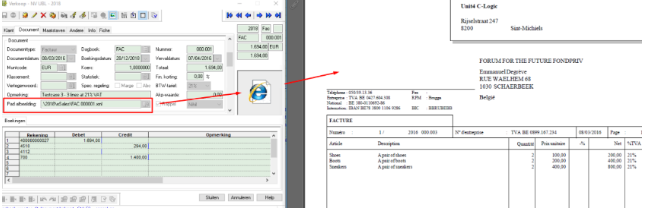
- In the example above, the external invoice number 20190362 will be read into Venice as 2019 000.362.
In Venice, a document number can contain a maximum of 6 positions.
If you do not wish to work with the external numbering, select the option automatically.
- To determine the appropriate journal to create invoices and credit notes, two methods can be utilized. One approach involves adopting specific positions based on the file identification, while the other involves proposing a predetermined journal for these documents. In the aforementioned scenario, a fixed journal was selected.
- To ensure proper allocation of sales, please specify the revenue account where you want them to be posted. Please note that the external package cannot identify the exact sales account you prefer to use.
- Press "Save" in order to save the settings. You will now be redirected to the original dialog box.
The process exists of 3 steps:
-
Extract the UBL files and transfer them to a temporary working folder.
-
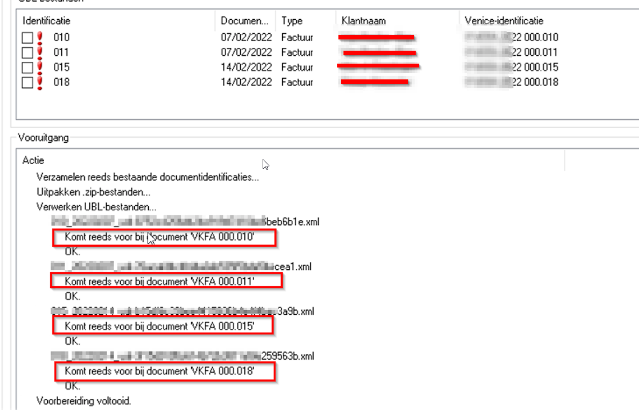
Perform a series of checks on the documents to ensure their validity as UBL files, confirm that they correspond to the current file (based on the company number), and check whether they have not been imported previously (based on the sales document identification).
-
Once all UBL files have been verified, the import process can begin.
- A sales document is now created for each UBL file.
If the intended recipient of the document does not currently exist, Venice will create a customer profile. The program will initiate a three-step verification process based on the company number, bank account number, and the combination of company name, street, postcode, and municipality.
- In the event of specific occurrences during the import process, such as a 0% measurement or the creation of a new customer, Venice will record these details in the information block of the sales document. By adding the "Information" column to your worksheet, you can easily view any relevant comments for each document.

- The electronic document is organized within the folder <financial year>esales> and renamed using a name that relates to the enrolled document <journal> <document number>. The file's path is also saved in tab "Path image".
You always have the possibility to edit the imported sales invoices afterwards. For more information, click here.