
How to link Go Getter with Octopus
In the article below, we will focus on how to link Go Getter with Octopus.
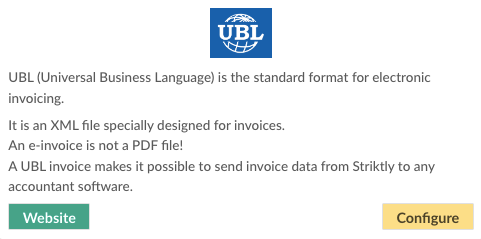
Currently, Octopus only supports UBL import.
What do you need to successfully use this integration:
- The name of the accounting package used by your accountant
- The frequency at which the invoices should be sent
- The e-mail address the invoices should be sent to
Establish the connection:
- Log in to the admin panel and go to the "Integrations" tab.
- Navigate to UBL and select "Configure".
- On the next page, enter a start date (all invoices from this date onwards will be exported).
- In the second field, you select the UBL version supported by your accountant's software.
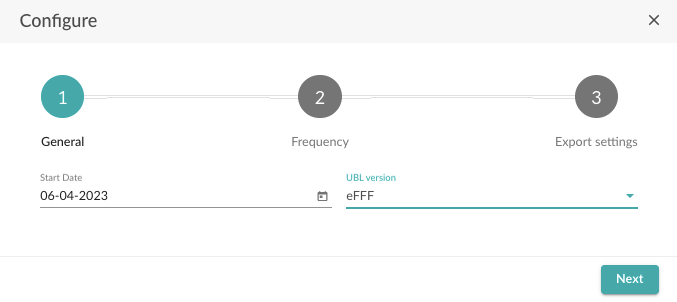
The UBL version is contingent upon the version supported by the accounting program that reads the UBLs. When in doubt, consult with either the accounting software manufacturer or your accountant.
- Select "Next".
On the next page, you can choose between manual or automatic export, we opt for automatic export.
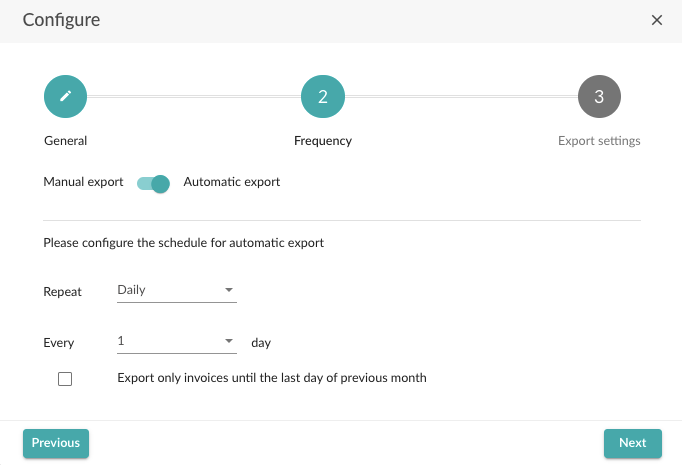
- Adjust the frequency of exports. This can be daily, weekly or monthly.
- If you choose weekly or monthly, you can also specify the day on which the export should take place.
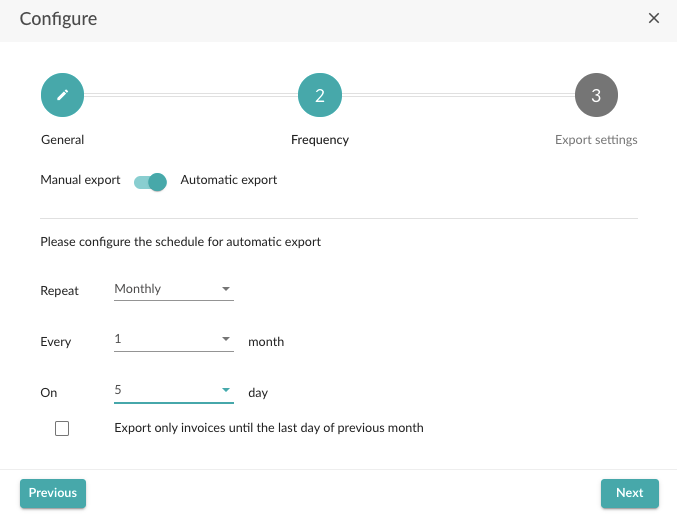
Most customers prefer scheduling a monthly export a few days into the new month, allowing for a comprehensive review by both you and your accountant.
It is important to note that filing VAT returns on a monthly basis is required, with a deadline on the 16th. To ensure adequate preparation time for your accountant, we recommend exporting data on the 5th day of the following month. Don't forget to select only the previous month's invoices before sending.
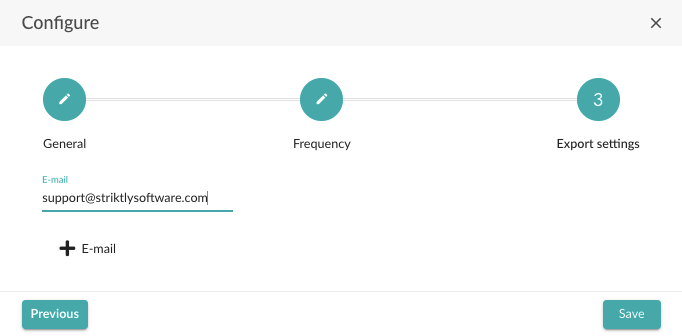
- After adjusting the settings, select "Next".
- Finally, fill in the e-mail address the invoices should be sent to.
- Select "Save".
If you have followed the steps correctly, your outbound invoices will now be automatically delivered to your accountant.
- After completion of the preceding steps, you will receive the following e-mail in your mailbox.
- Click on "Download" to download the UBL files in zip format.
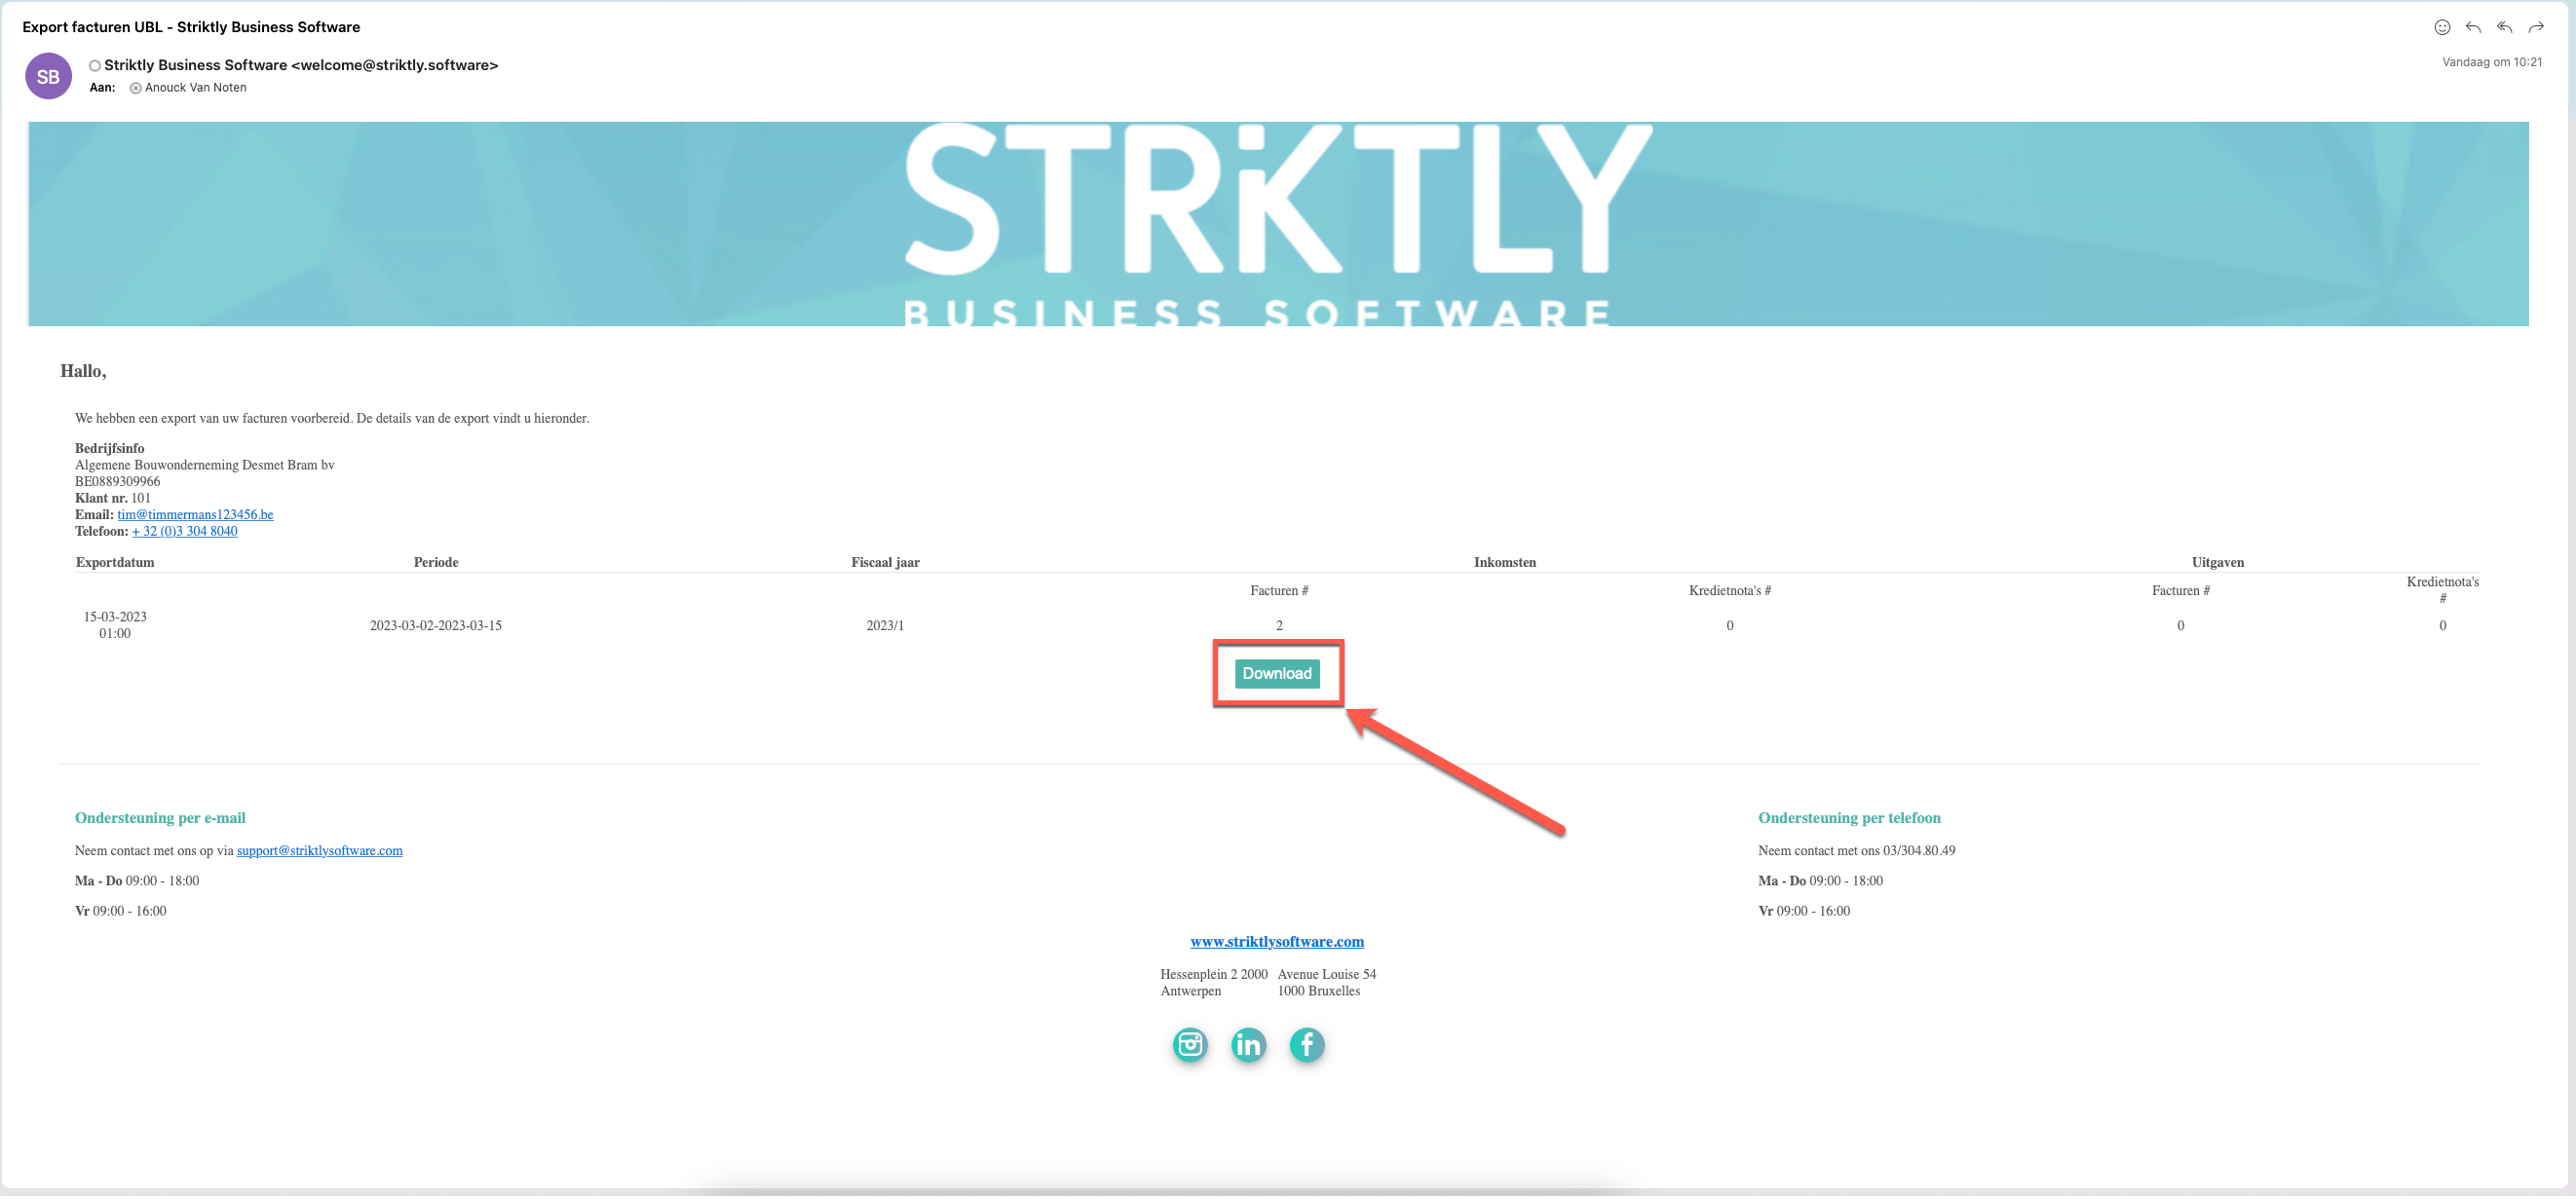
- Open the file in order to extract the documents.
Efficiently streamline the UBL storage process for Octopus by correctly placing the files from the ZIP archive on your computer.
Ensure that the directory where you place your files corresponds to the directory location indicated in Octopus's UBL import (as indicated below).
Import UBL files in Octopus:
- Some conditions apply for importing UBL files into Octopus:
- The VAT number displayed on the imported invoice must match the VAT number of the file in which the import is carried out.
- Regarding the invoice date of the imported invoice, the corresponding fiscal year/period must be available in the file in which the import is carried out.
- Connections that have not yet been made, will be created based on the information provided in the electronic invoice.
- Xml files must first be placed in DMS Import Viewer.
- Once documents have been placed in the import viewer, the process will start via the menu "Accounting" - "Import electronic invoices".
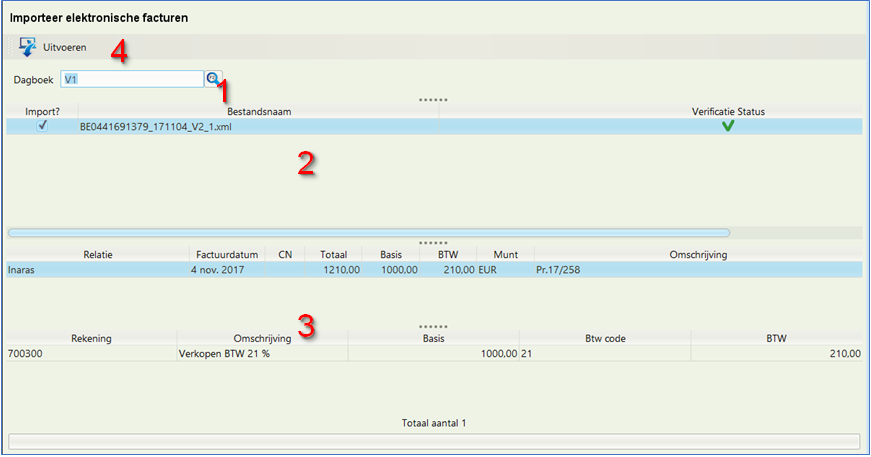
- The example below shows how a xml file of a sales invoice is processed into a sales entry.
- First select the journal in which the entries have to be created (1).
- Afterwards, the uploaded files will be shown (2).
- You can see the details of the invoice in (3).
- Select "Execute" (4) to create the sales entry.
- In the case any errors have been found in the xml file, you will receive a notification.
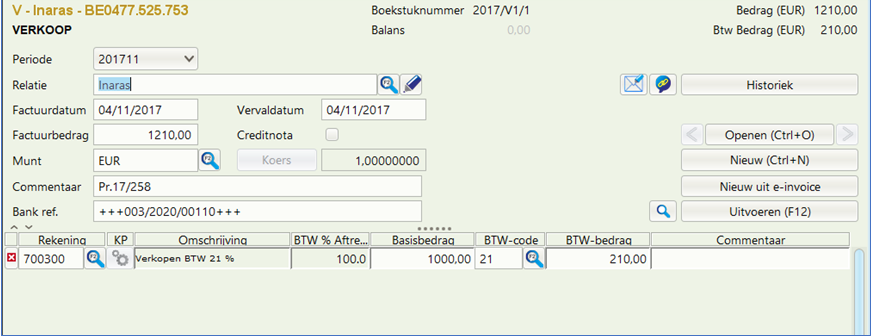
- After successful completion of the process, you can have a look at the sales entry in the available lists or on the record page.
Note that there are no available screenshots of the above software package.