
Follow the steps below to create an advance invoice and recalculate it with the final invoice.
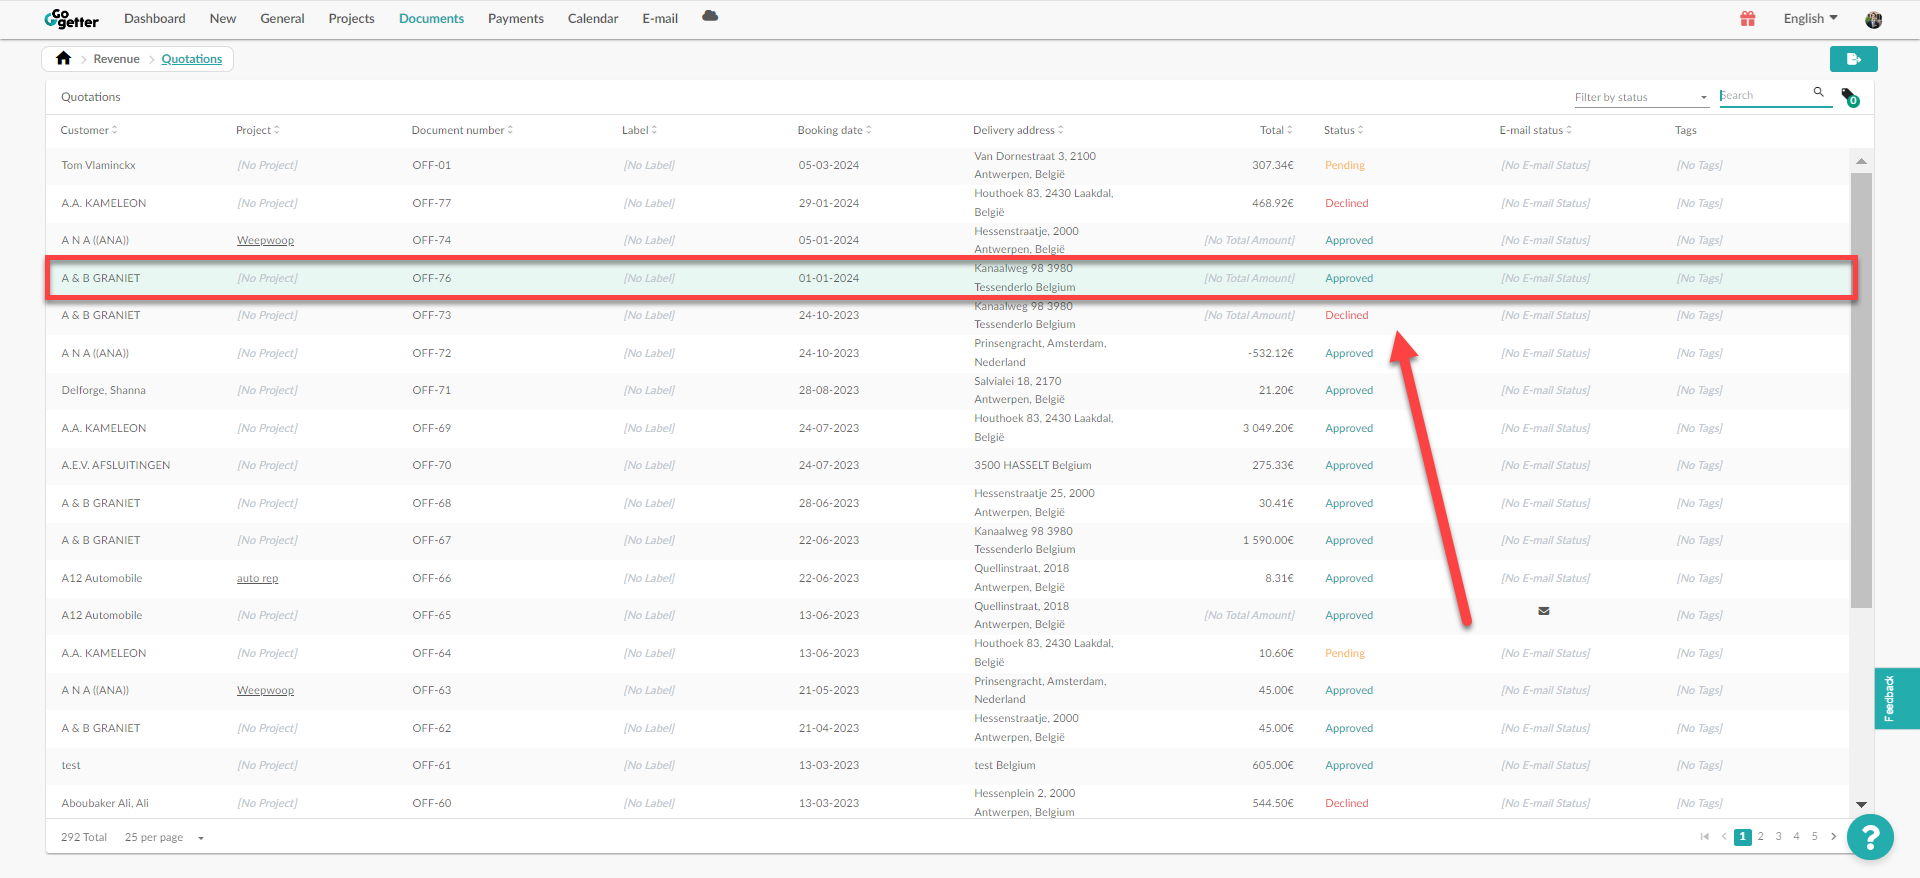
1: Your quotation has been approved.
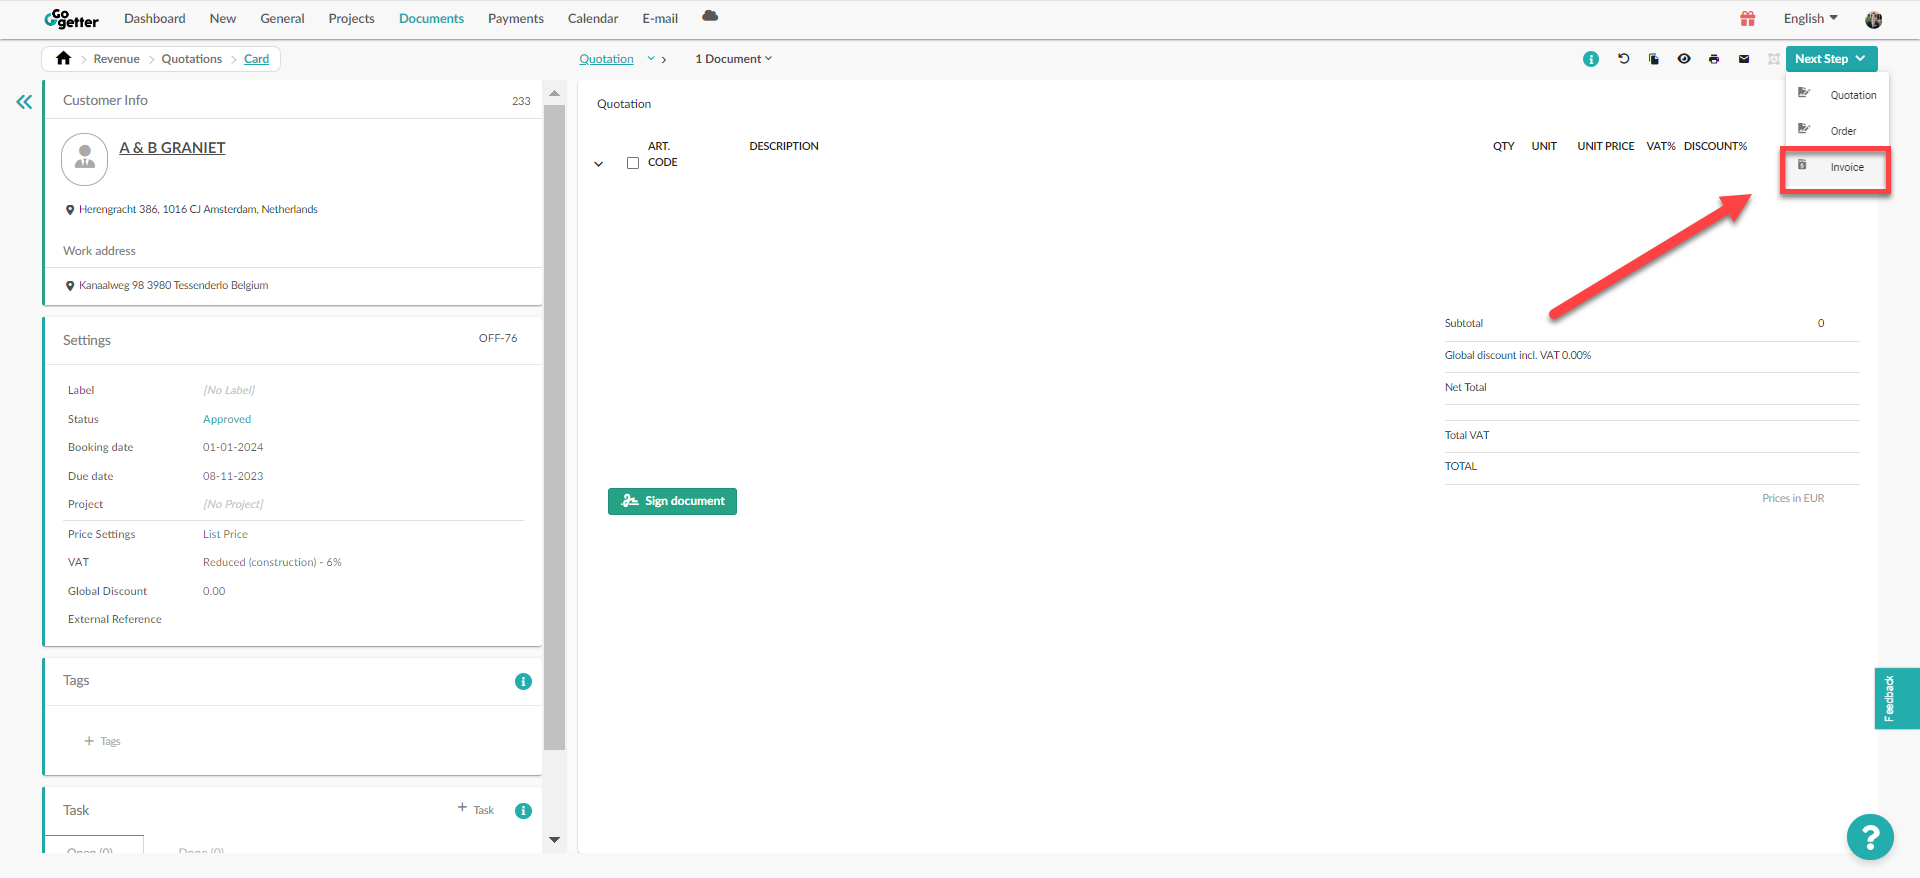
- Navigate to the quotation that has been approved and press the green button "Next step".


- Select: Invoice (Pay attention: this will be the final invoice). All the details of your quotation will be automatically copied to your invoice. At the end, we will deduct the amount of the advance invoice from the total invoice balance.
- Add a header by selecting the three dots and then "Header".
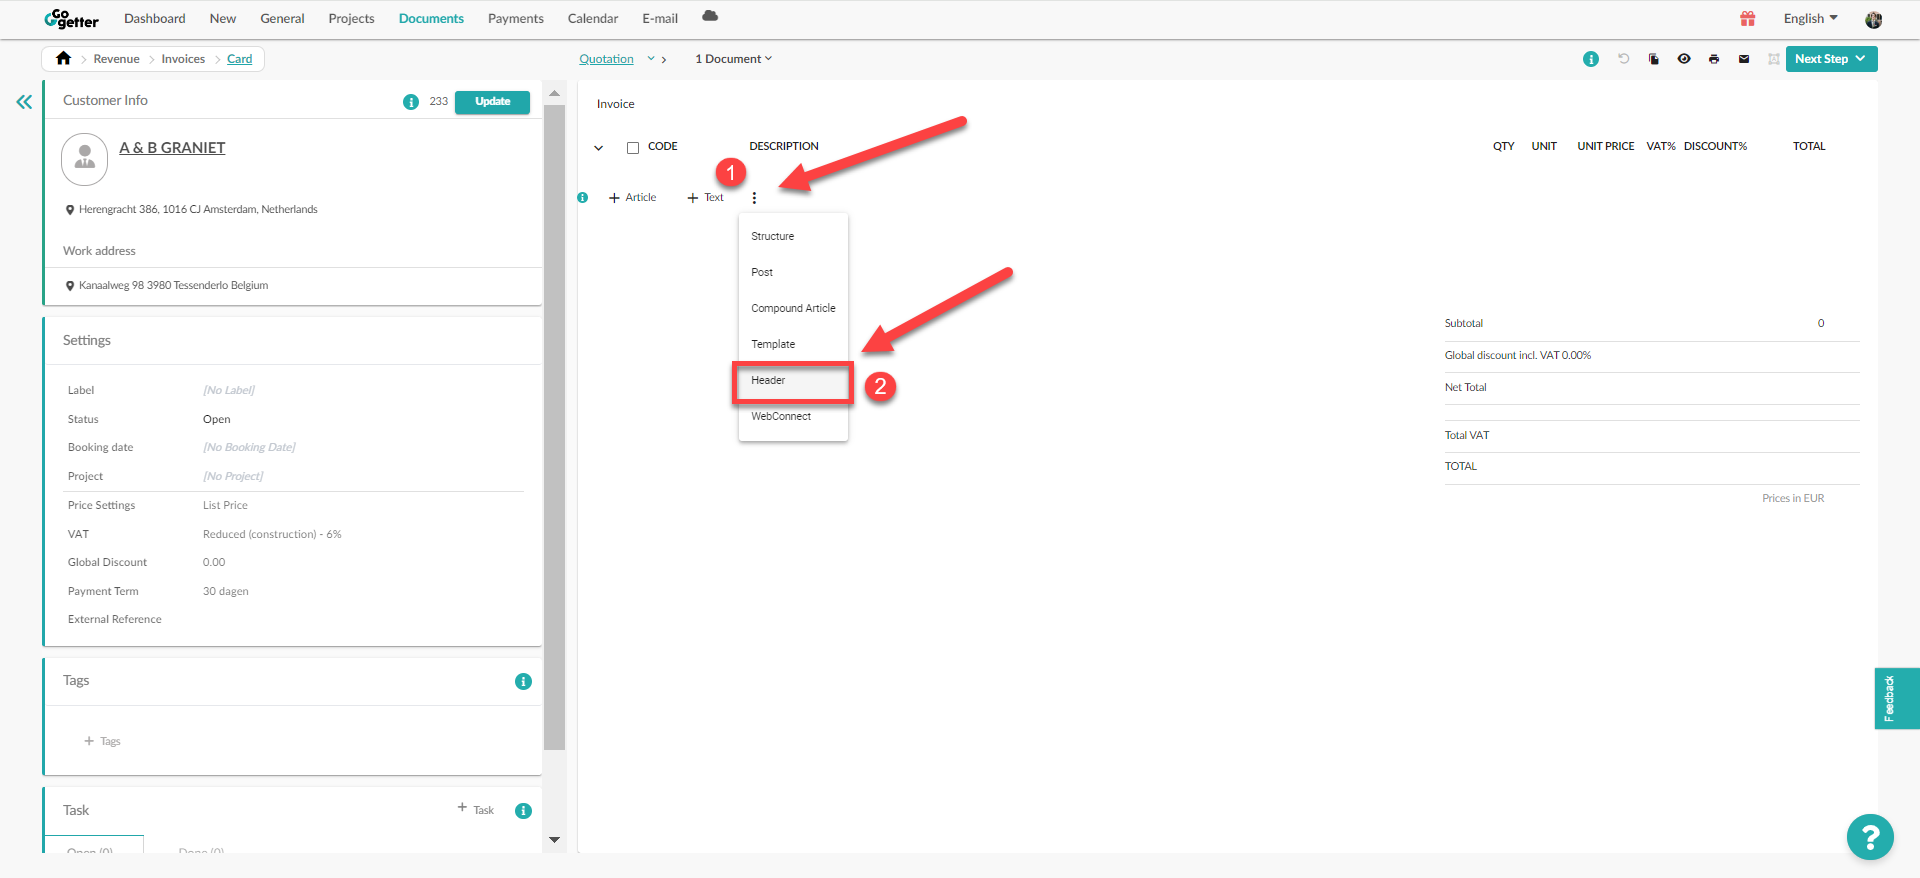
- Complete the header: invoice balance.

2: Create an advance invoice.
- Go to the customer card
- Select the green "+ Document" button at the top right
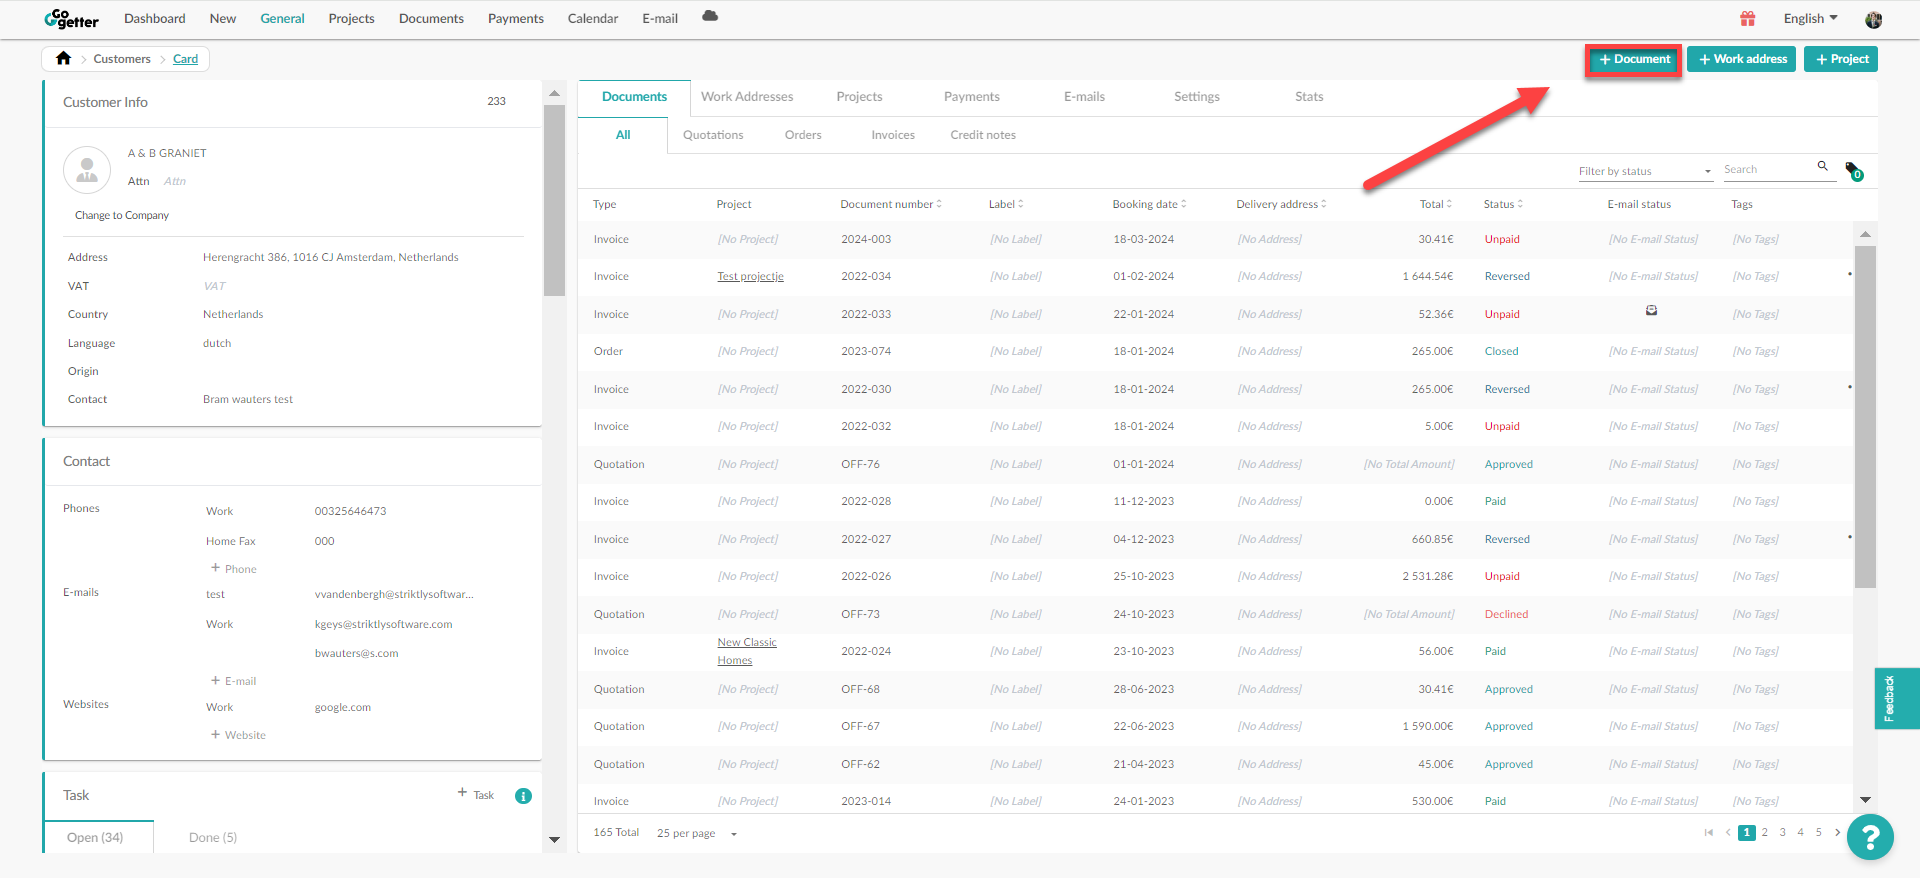
- Select the document type: "Invoice"
- "Next"
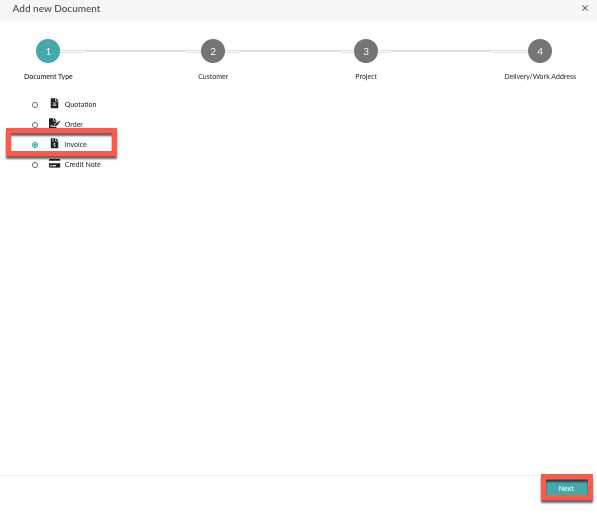
- "Complete"
- Now a new blank invoice will be created
- Add a header: select the three dots, then "Header"
- Fill in the header: "Advance invoice to quotation" (FILL IN THE QUOTATION NUMBER)

- Now add an article -> "+ Article": start typing at "Choose description": e.g. Advance to be paid for execution of works. -> Enter the amount -> confirm by selecting the green check mark.

3: Deduct the advance invoice from your final invoice.
- Navigate to your final invoice, which you have made in step one.
- Here you will find a complete overview similar to the quotation.
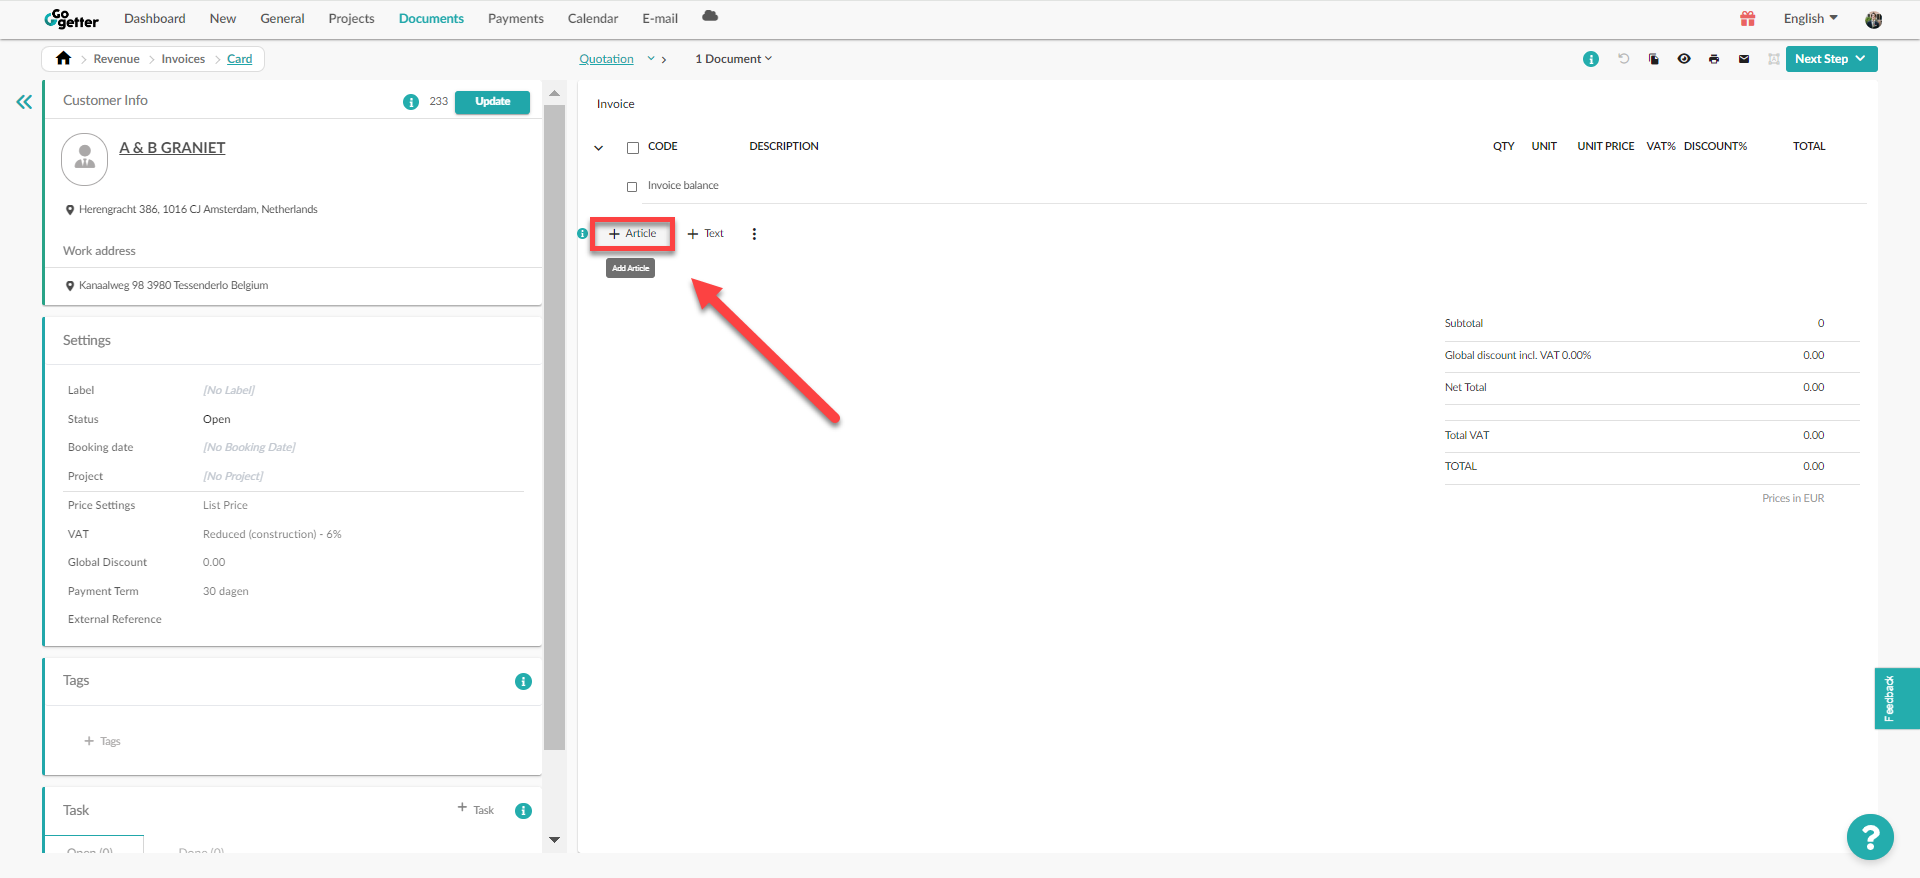
- To add an article -> select "+Article" and add a description under "Choose Description", for instance, "advance invoice regarding the execution of works has already been paid". (INVOICE NUMBER of advance invoice)

- Place a minus symbol (-) in front of the "1" under quantity (by doing this the amount will become negative).
- Fill in the amount of the advance invoice that already has been paid under "unit price".
If you wish to exclude the VAT from the advance invoice, you have to select "No VAT" for this particular line. Confirm by selecting the green check mark.
You can immediately send the final invoice you have created to your customer.