
In this article, we will show you how to assign/link a payment to a document.
Before going any further, note that Go Getter can automatically detect, identify and link payments to the right document, based on structured communication, invoice number entry and even customer recognition with amount validation.
That means the majority of payments will already be assigned!
There are 2 ways to assign payments to a document:
- You can assign the payment to a document from the bank book
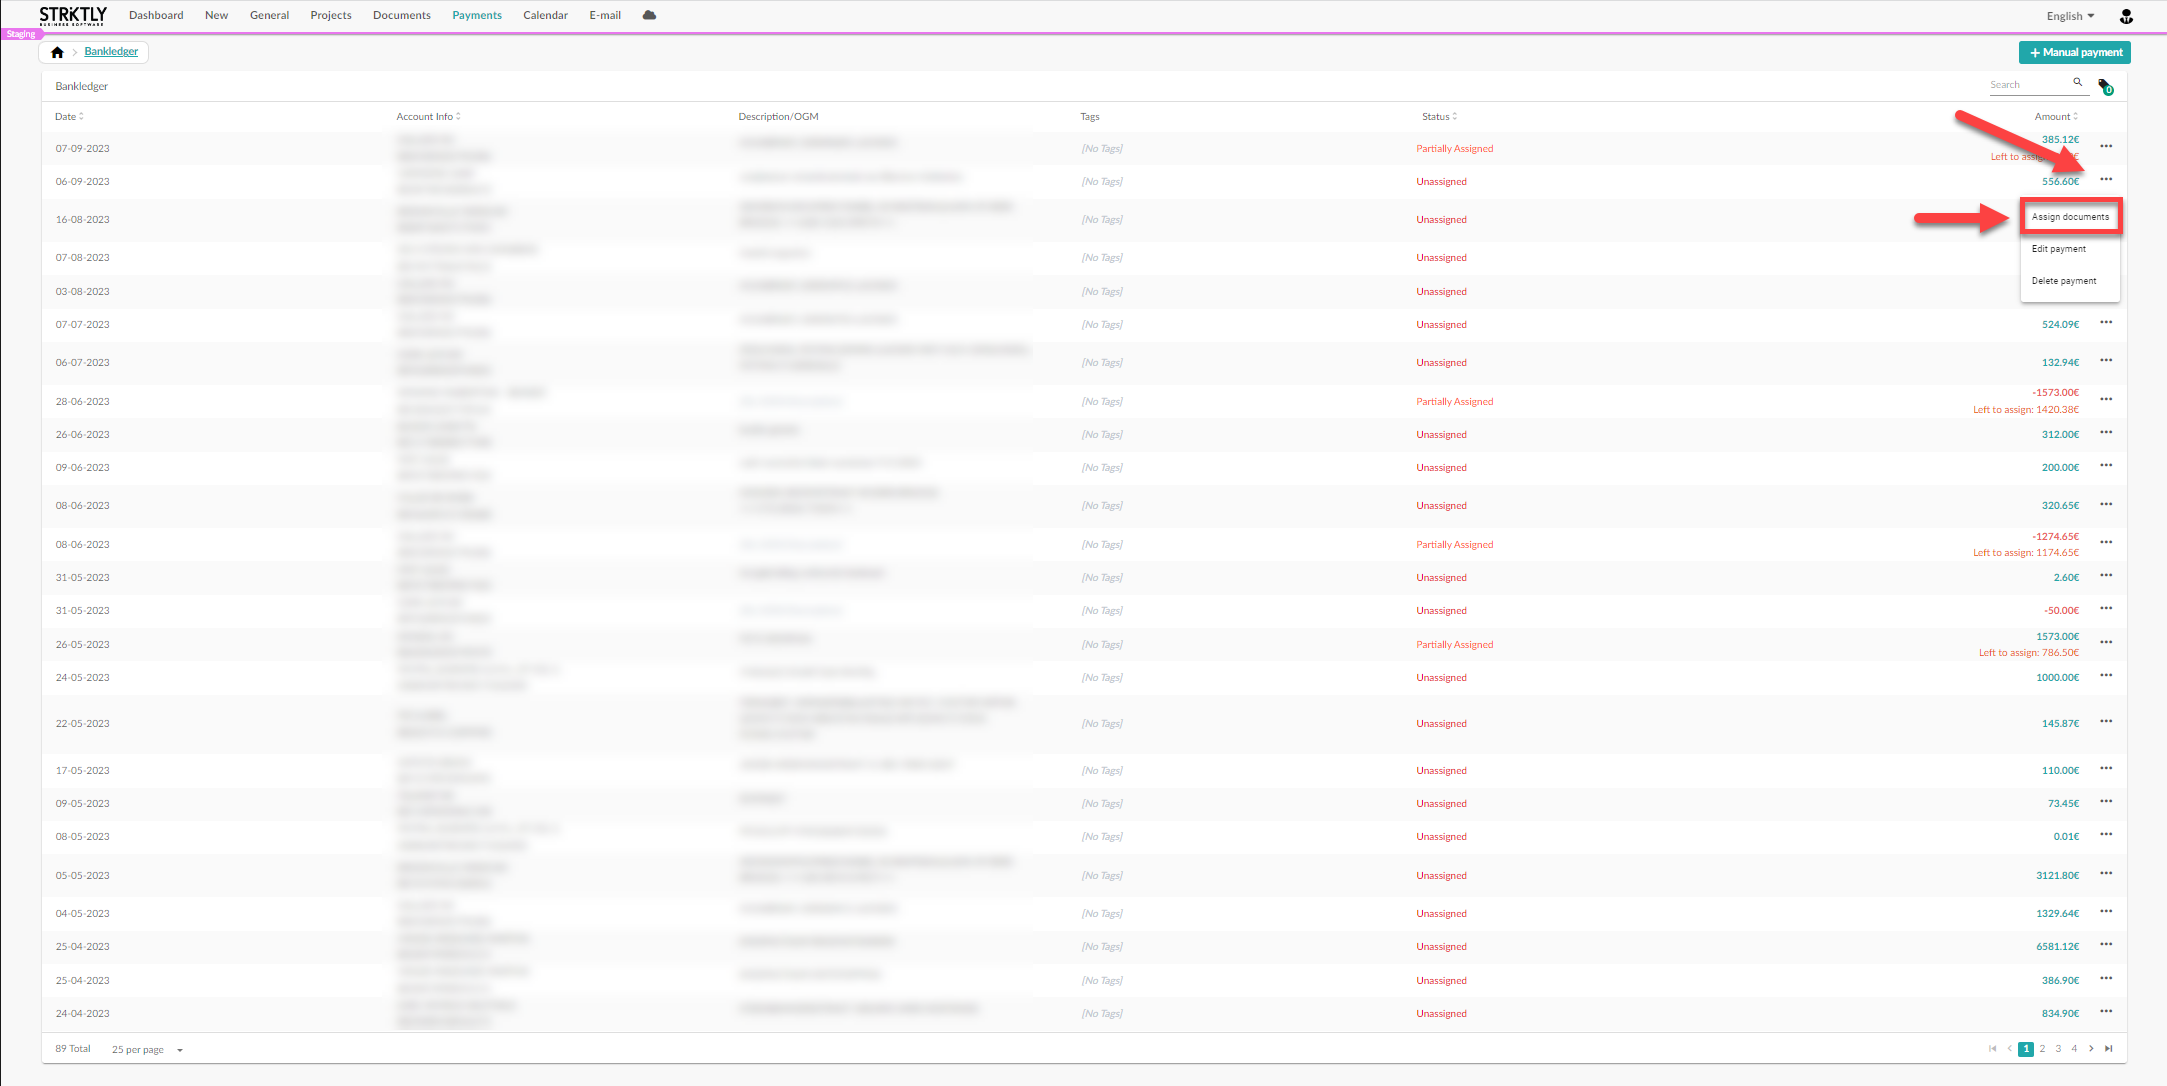
Go to your bank book via the payments menu. Here you will have an overview of payments that have not yet been assigned.
Don't see any payments appearing? Then check that your bank is properly linked!
Click here for more information.
Our customer success colleagues can of course help you with this.
Click on the 3 dots at the back of the payment to open the action menu.
Here, in addition to the options to edit or delete the payment, you can also choose to link a document. Click on this action:
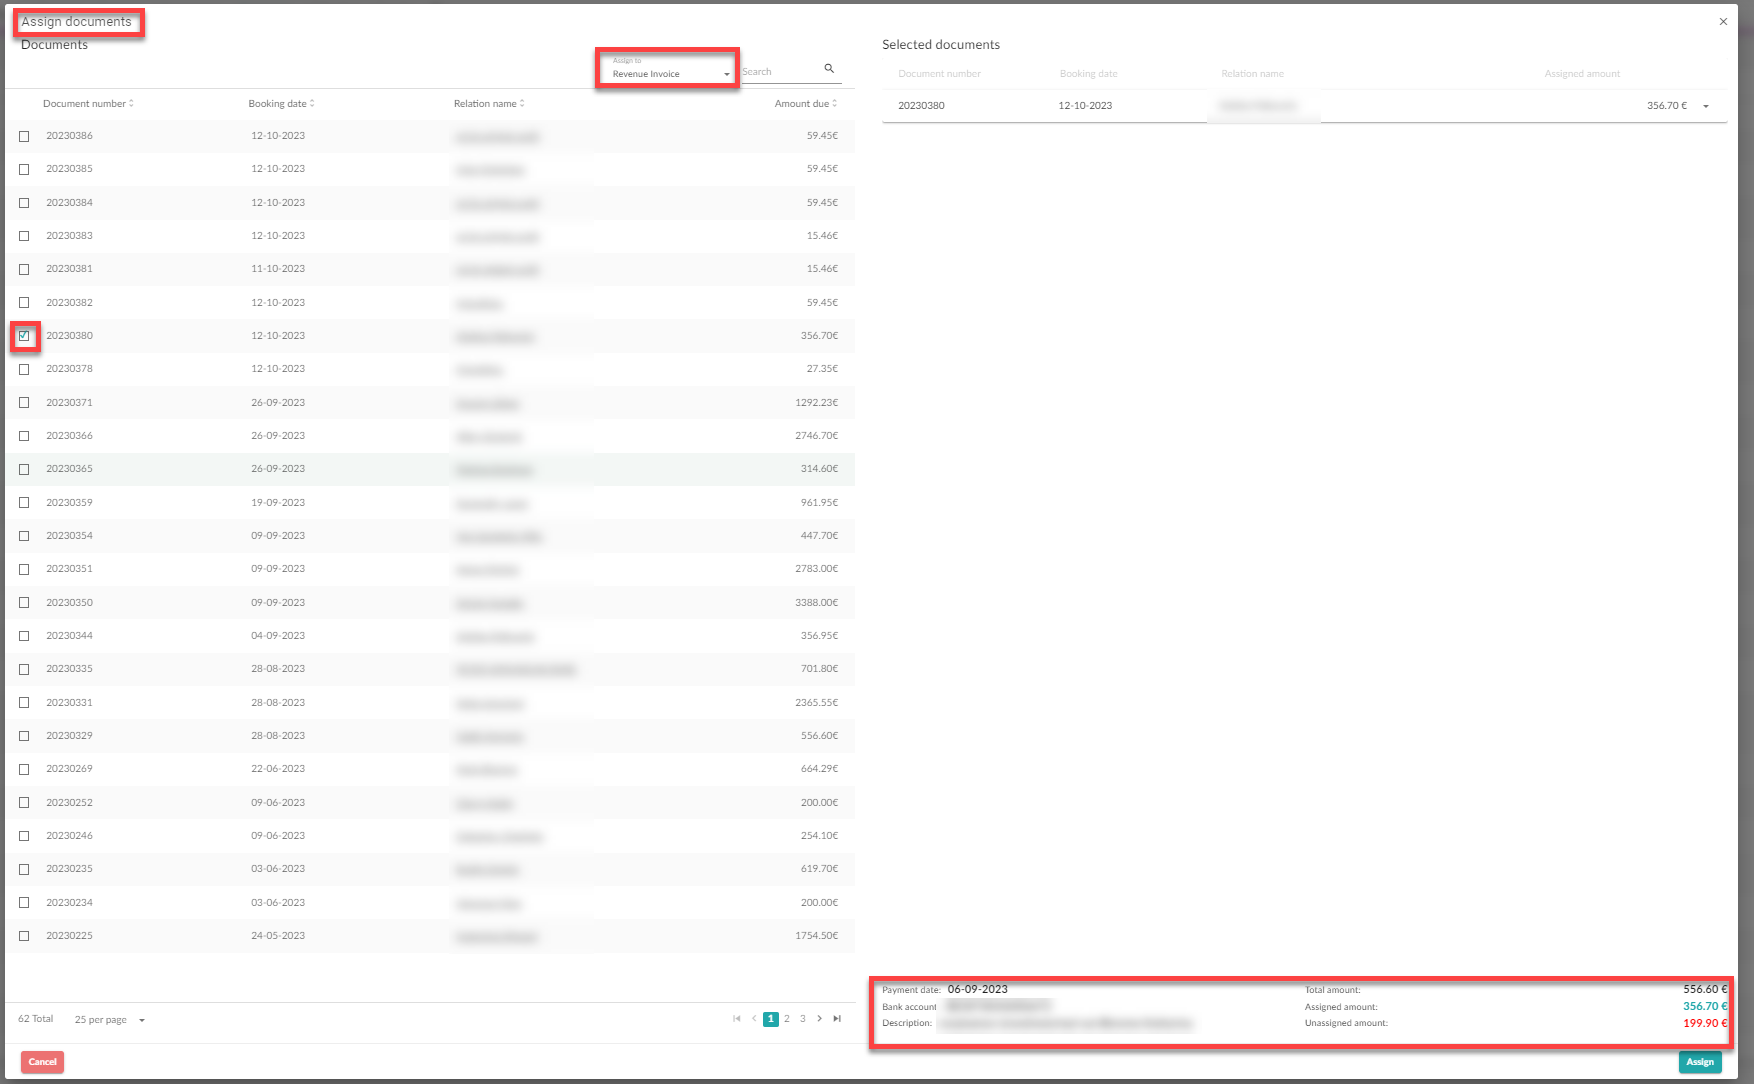
In the new menu, on the left, you can select 1 or more documents you want to pay for with this payment.
Locate your document on the left, and select the desired document. You will see that your document sprints to the right-hand side of the screen. There you can optionally use the arrow to choose whether you want to pay for the entire document, or just a part.
If the amount of the payment covers the full amount of the document, including any possible charges or interest, then Go Getter will automatically adjust it that way.
If there is a discount cash available on the document, and the payment is within the discount period, Go Getter will also automatically take this into account.
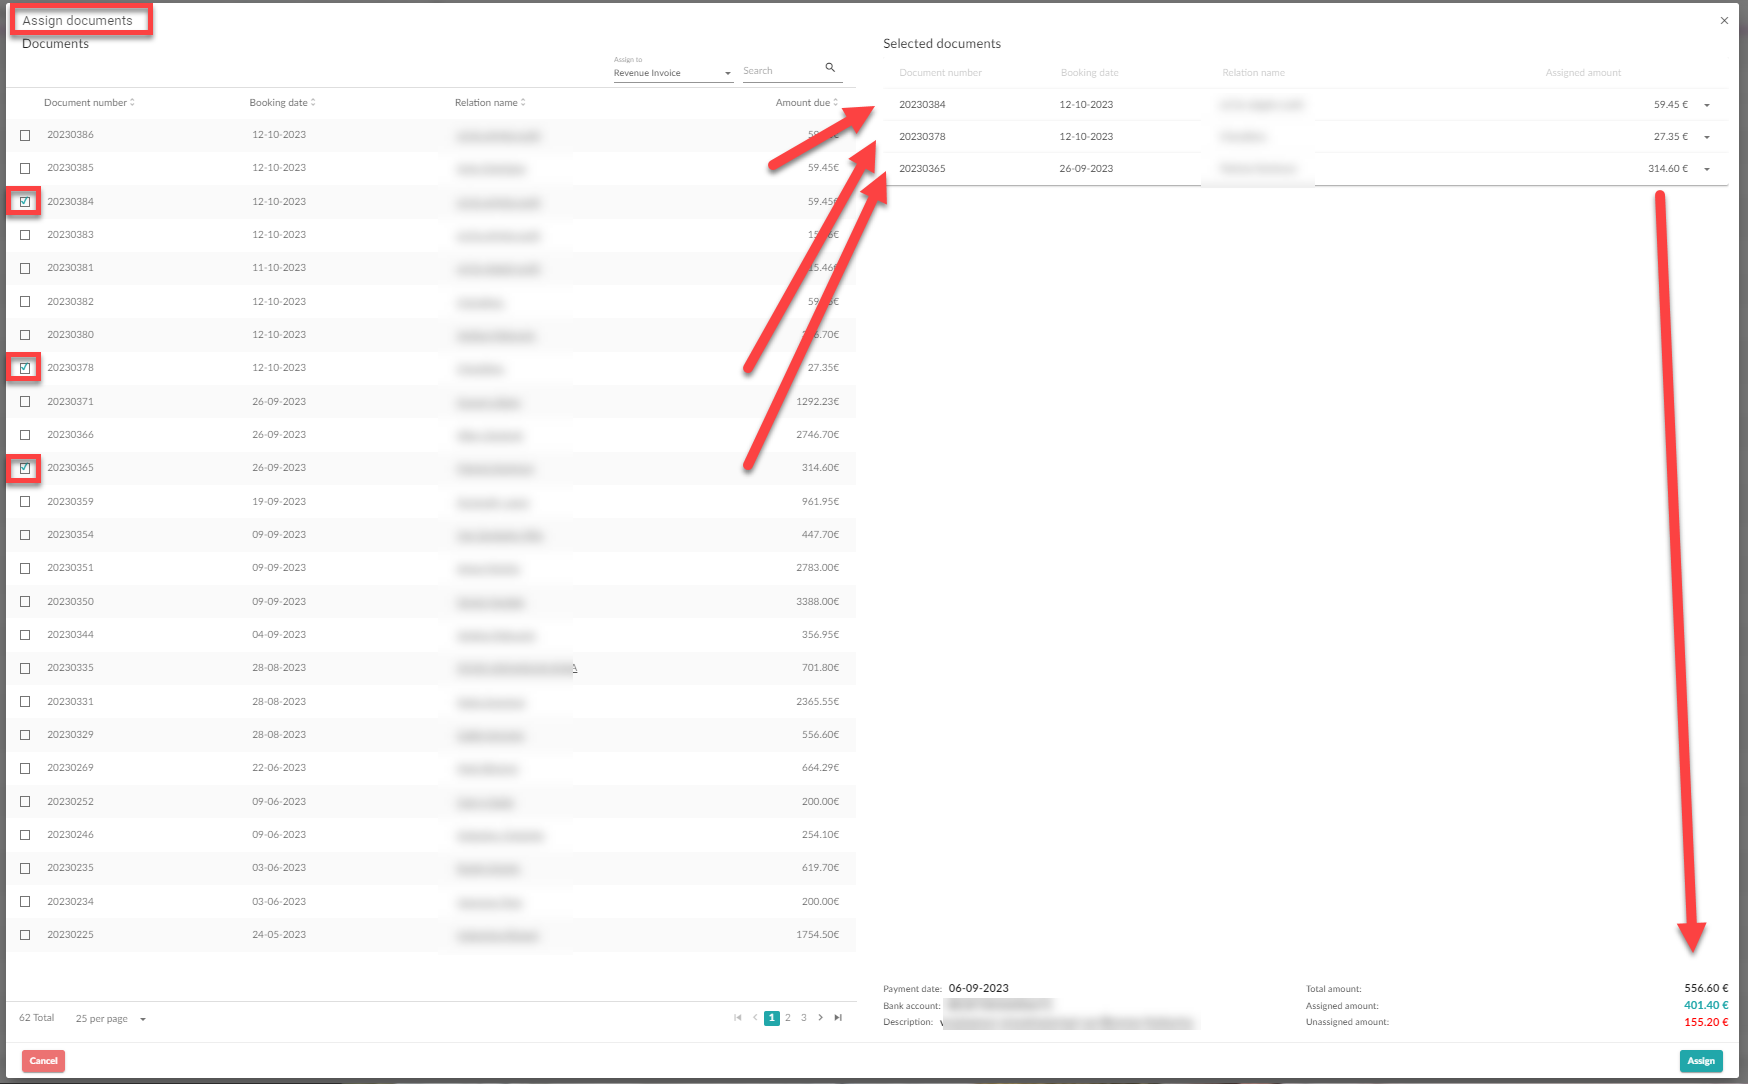
You can of course allocate several documents to 1 payment. Once the full amount of the payment has been allocated, you cannot allocate any more documents.
2. You can assign the document to a payment from the unpaid invoice list.
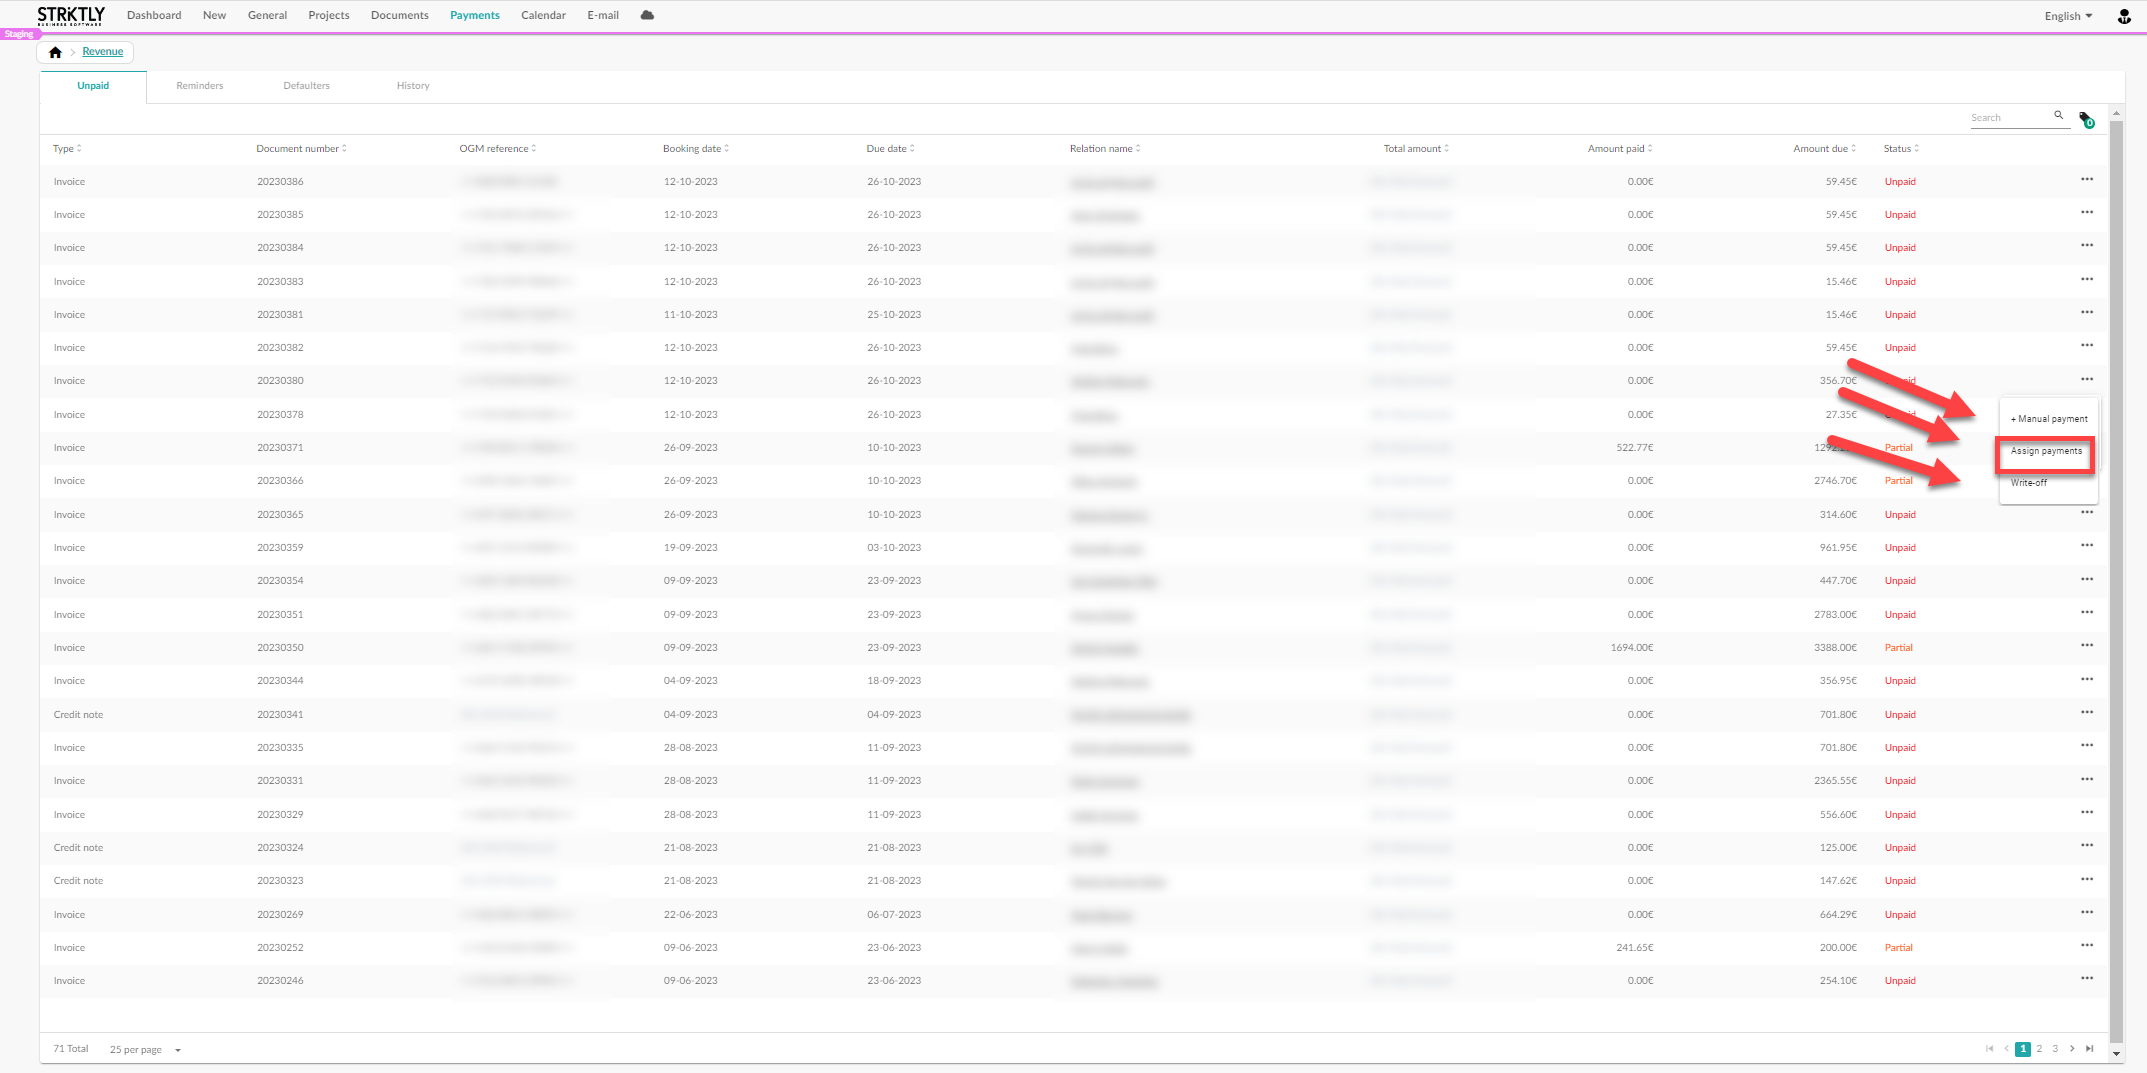
From the payments menu, go to your income or expenses.
The way of linking is the same for your income as your expenses, with the difference that income is dotted with positive (incoming) payments, and expenses are dotted with negative (outgoing) payments.
Click on the 3 dots at the back of the document to open the action menu.
Here you can choose to:
- Enter manual payment to pay for the document
- Assign payment
- Link to credit note
The option to write off outstanding invoices with a credit note is only available if there is effectively a credit note for that customer. You can also look up the credit note itself, and link it to an invoice in the same way!
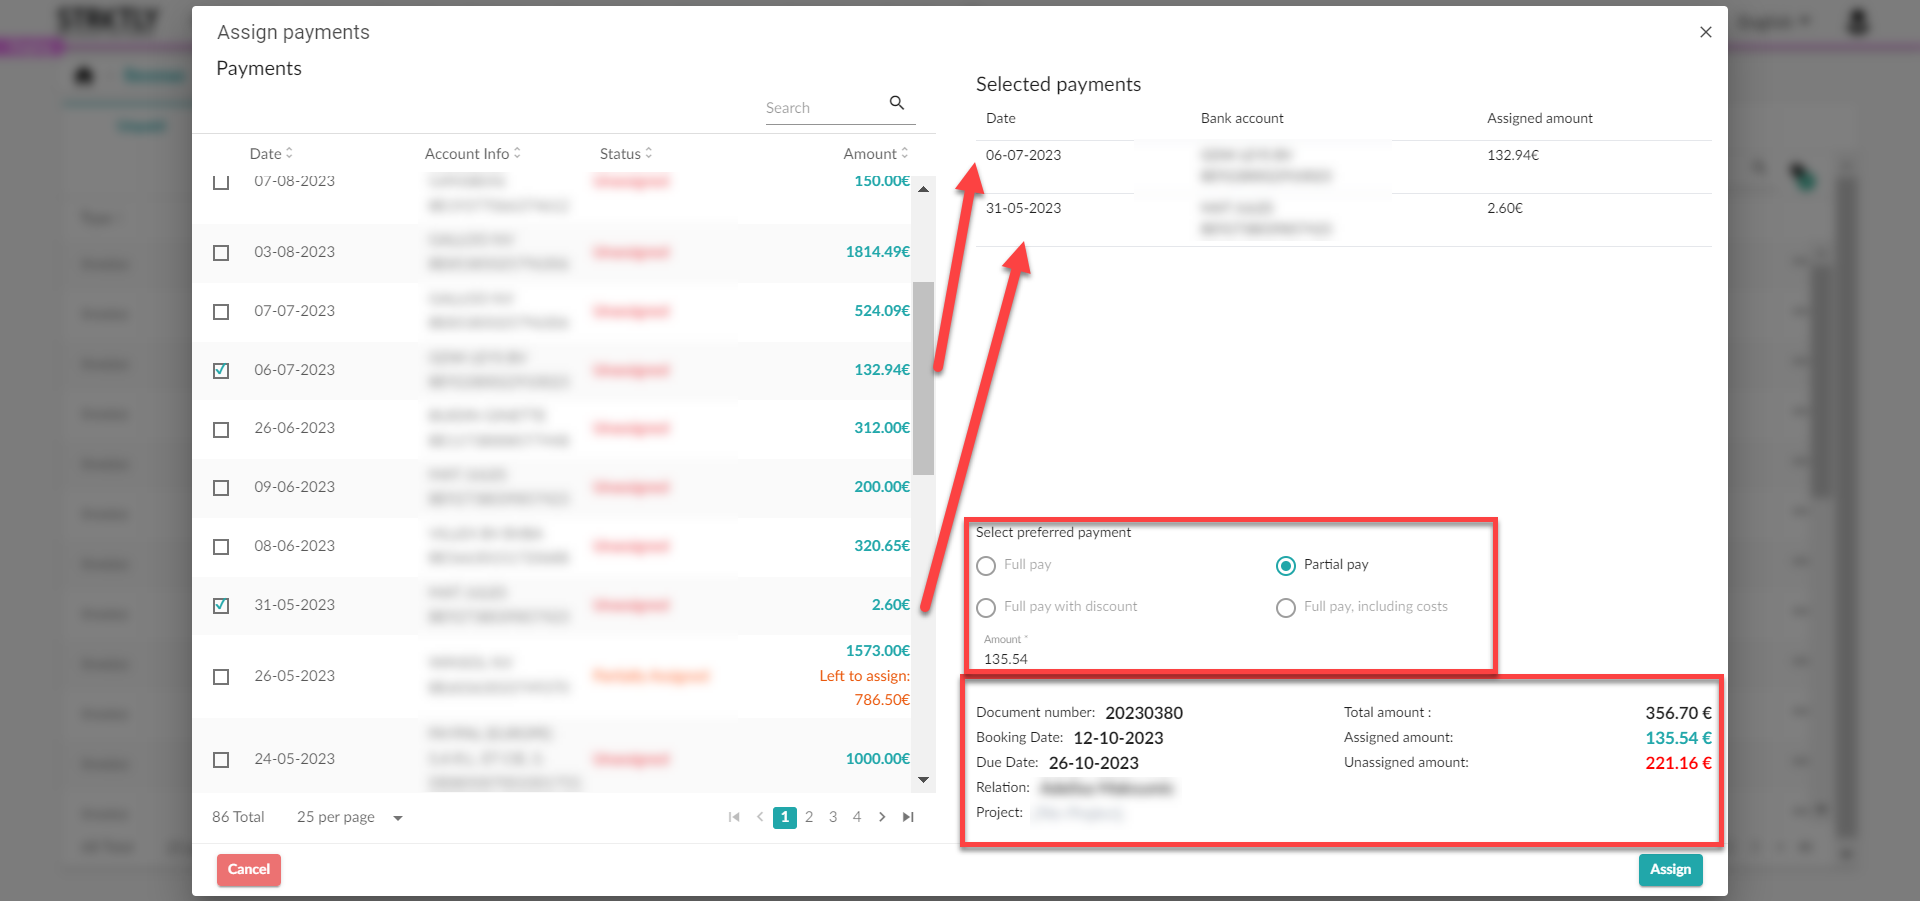
In the new menu, on the left, you can select 1 or more payments you want to assign to this document.
Find your payment on the left, and select it. You will see that the payment sprints to the right-hand side of the screen. There you can optionally use the arrow to choose whether you want to use the entire payment, or just a piece of it.
You can of course assign several documents to 1 payment. Once the full amount of the payment has been allocated, you cannot allocate any more documents.
If the amount of the payment covers the full amount of the document, including any possible charges or interest, then Go Getter will automatically adjust it that way.
If there is a discount cash available on the document, and the payment is within the discount period, Go Getter will also automatically take this into account.